> ## Documentation Index
> Fetch the complete documentation index at: https://docs.nikaplanet.com/llms.txt
> Use this file to discover all available pages before exploring further.
# Setup the Plugin in GIS
> Install and configure the NIKA Planet plugin in QGIS or ArcGIS to run custom geoprocessing workers directly from your GIS.
## Installing the plugin
The QGIS plugin for NikaPlanet is available [here](https://github.com/NikaGeospatial/nikaplanet-qgis-plugin).
To install the plugin:
1. On the github repository page, click on the code button and select "Download ZIP"
 2. In QGIS, go to the "Plugins" menu (upper left) and select "Manage and Install Plugins..."
 3. Click the "Install Plugin From ZIP" button, then click the "..." button and select the downloaded ZIP file
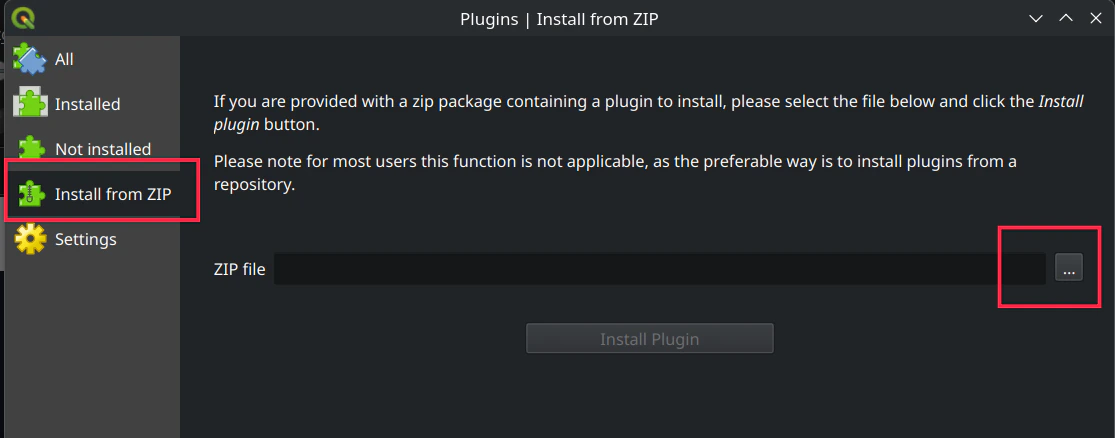 4. Click the "Install Plugin" button
5. The plugin will be installed and you can now use it to connect to NikaPlanet
## Logging in to NikaPlanet
Logins are shared between the NikaPlanet website and the QGIS plugin. If you are already logged in to NikaPlanet, you simply need to authorize the plugin to access your account.
1. In QGIS, click the "NikaPlanet" button in the top bar. It is generally located beside the Python button.
4. Click the "Install Plugin" button
5. The plugin will be installed and you can now use it to connect to NikaPlanet
## Logging in to NikaPlanet
Logins are shared between the NikaPlanet website and the QGIS plugin. If you are already logged in to NikaPlanet, you simply need to authorize the plugin to access your account.
1. In QGIS, click the "NikaPlanet" button in the top bar. It is generally located beside the Python button.
 2. If this is your first time logging in, you will be prompted to authorize the plugin to access your account. Click the "Sign in with NikaPlanet" button.
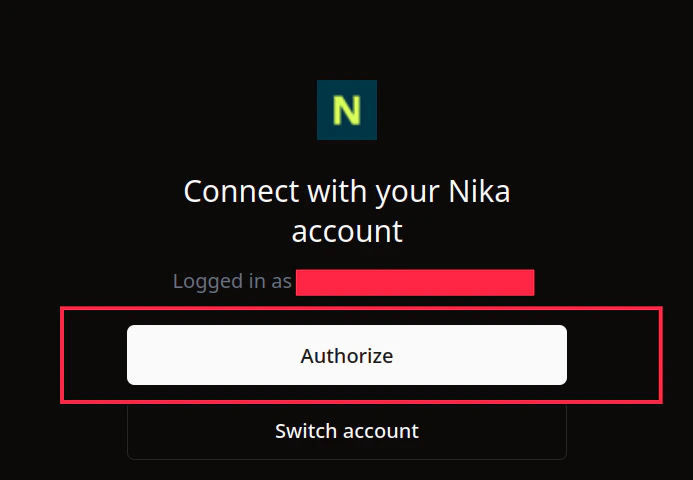
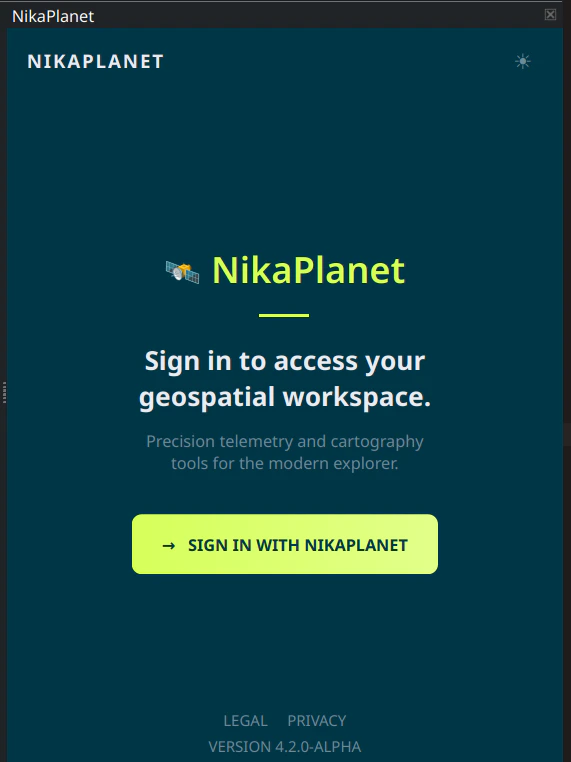 3. You will be redirected to the NikaPlanet login page. Enter your NikaPlanet credentials and click the "Sign in" button.
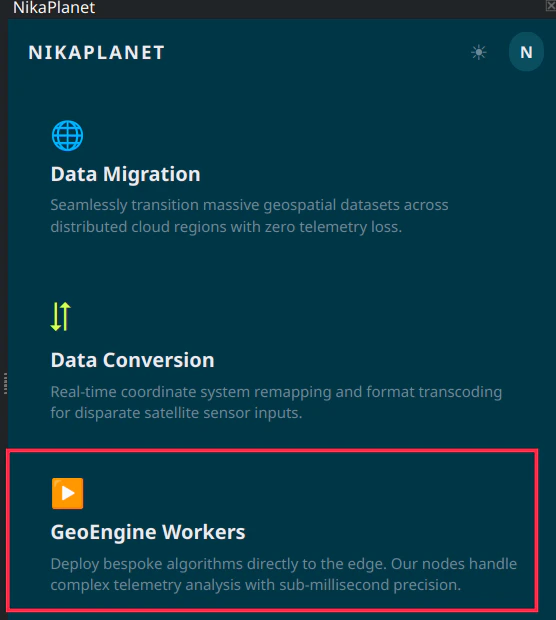
 4. You will be redirected back to QGIS and the NikaPlanet panel will automatically navigate to the dashboard. Click the "Geoengine Workers" button to view your workers.
 ## Installing the plugin
The ArcGIS Pro plugin is currently not available for download. Please contact us at [support@nikaplanet.com](mailto:support@nikaplanet.com) if you are interested in using the plugin.
## Logging in to NikaPlanet
Logins are shared between the NikaPlanet website and the ArcGIS Pro plugin. If you are already logged in to NikaPlanet, you simply need to authorize the plugin to access your account.
1. In ArcGIS Pro, click the "Nika" tab in the top bar, then click the "Show Panel" button.
2. If this is your first time logging in, you will be prompted to authorize the plugin to access your account. Click the "Sign in with NikaPlanet" button.
3. You will be redirected to the NikaPlanet login page. Enter your NikaPlanet credentials and click the "Sign in" button.
4. You will be redirected back to ArcGIS Pro and the NikaPlanet panel will automatically navigate to the dashboard. Click the "Geoengine Workers" button to view your workers.
## Installing the plugin
The ArcGIS Pro plugin is currently not available for download. Please contact us at [support@nikaplanet.com](mailto:support@nikaplanet.com) if you are interested in using the plugin.
## Logging in to NikaPlanet
Logins are shared between the NikaPlanet website and the ArcGIS Pro plugin. If you are already logged in to NikaPlanet, you simply need to authorize the plugin to access your account.
1. In ArcGIS Pro, click the "Nika" tab in the top bar, then click the "Show Panel" button.
2. If this is your first time logging in, you will be prompted to authorize the plugin to access your account. Click the "Sign in with NikaPlanet" button.
3. You will be redirected to the NikaPlanet login page. Enter your NikaPlanet credentials and click the "Sign in" button.
4. You will be redirected back to ArcGIS Pro and the NikaPlanet panel will automatically navigate to the dashboard. Click the "Geoengine Workers" button to view your workers.