> ## Documentation Index
> Fetch the complete documentation index at: https://docs.nikaplanet.com/llms.txt
> Use this file to discover all available pages before exploring further.
# Assign a Labeling Job
> Learn how to assign labeling jobs to team members and manage annotation workflows
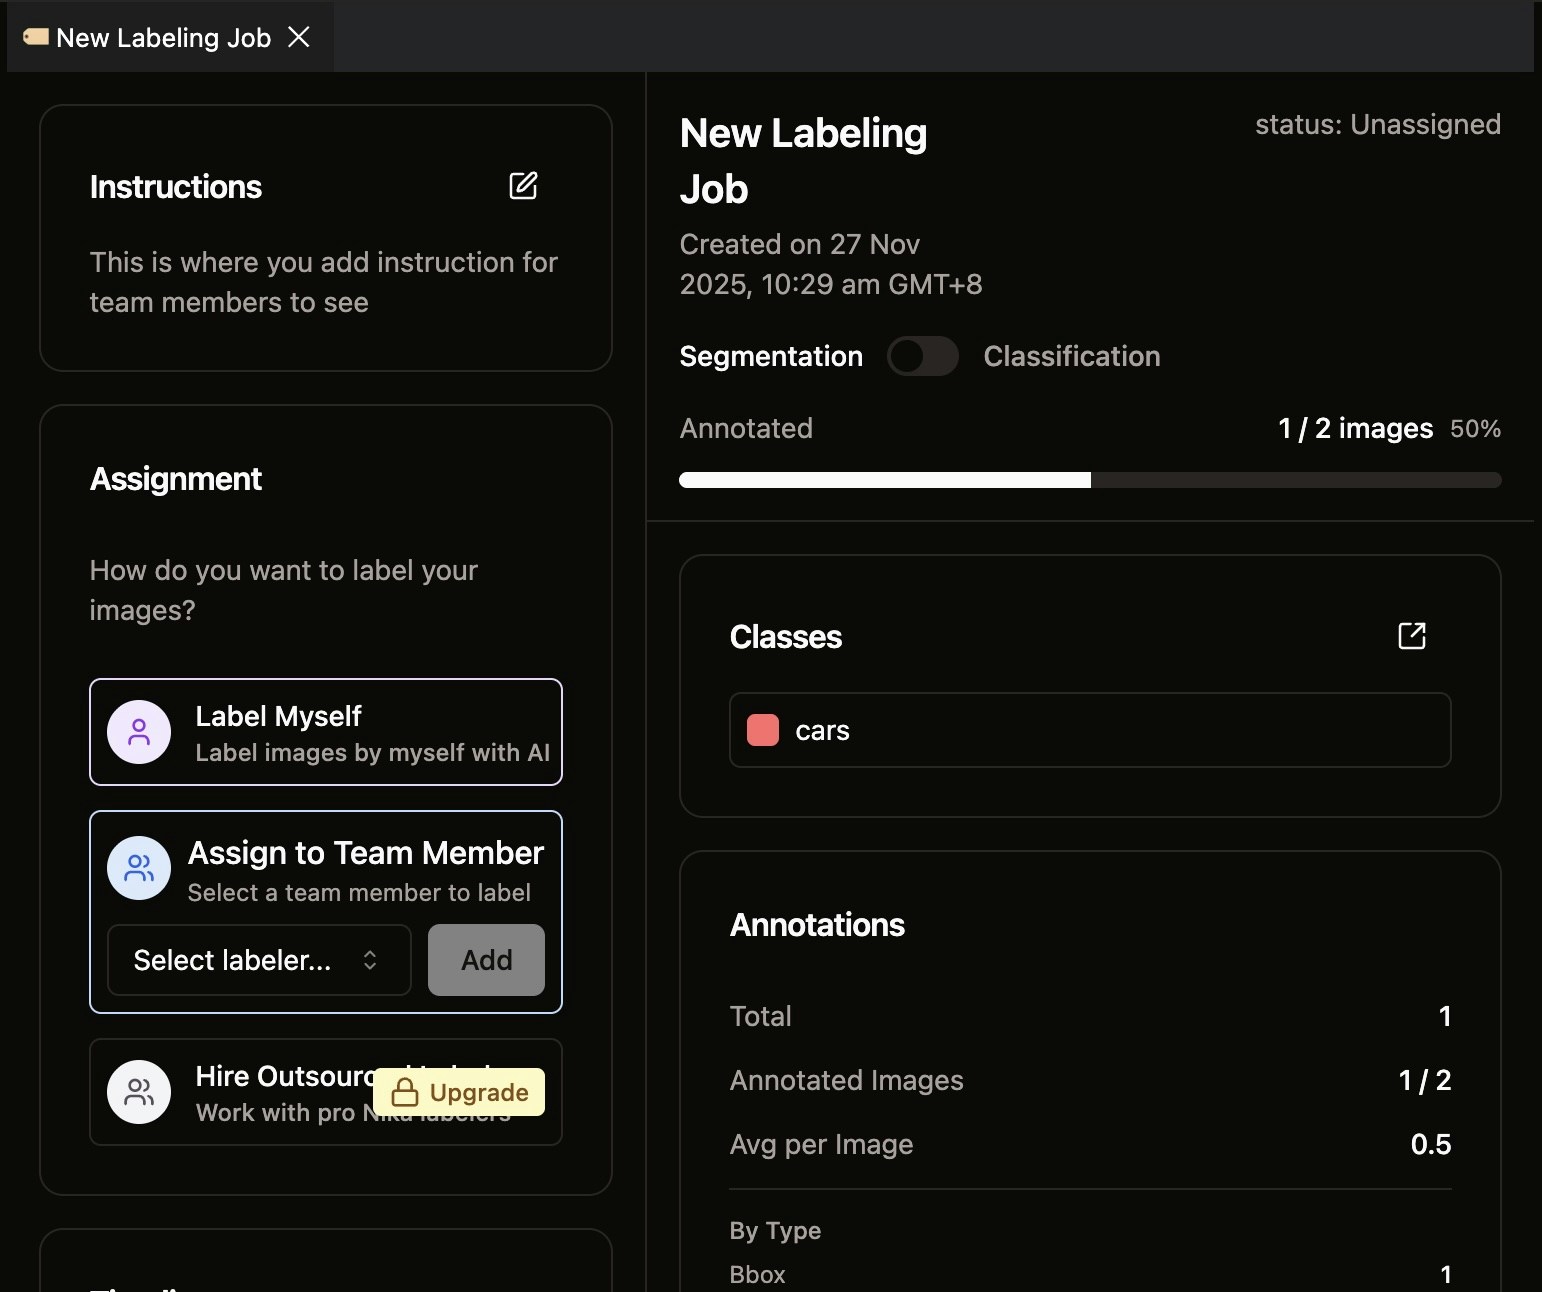
Learn how to assign your created labeling jobs to team members and manage the annotation workflow effectively.
 ## Step 1: Add Collaborators to Your Workspace
Before you can assign a labeling job to team members, you need to ensure they have access to your workspace. This requires two steps:
### Add People to Your Team
First, invite users to your team by following the [Invite to Team](/guides/access-control/invite-to-team) guide. This adds them to your organization's team.
### Grant Workspace Access with EDITOR Permissions
Next, give team members access to the specific workspace containing your labeling job. Follow the [Invite to Workspace](/guides/access-control/invite-to-workspace) guide and make sure to assign them **EDITOR** access. Only users with EDITOR access can be assigned as labelers or reviewers.
## Step 2: Assign Users to the Labeling Job
Once your team members have EDITOR access to the workspace, you can assign them to the labeling job.
## Step 1: Add Collaborators to Your Workspace
Before you can assign a labeling job to team members, you need to ensure they have access to your workspace. This requires two steps:
### Add People to Your Team
First, invite users to your team by following the [Invite to Team](/guides/access-control/invite-to-team) guide. This adds them to your organization's team.
### Grant Workspace Access with EDITOR Permissions
Next, give team members access to the specific workspace containing your labeling job. Follow the [Invite to Workspace](/guides/access-control/invite-to-workspace) guide and make sure to assign them **EDITOR** access. Only users with EDITOR access can be assigned as labelers or reviewers.
## Step 2: Assign Users to the Labeling Job
Once your team members have EDITOR access to the workspace, you can assign them to the labeling job.
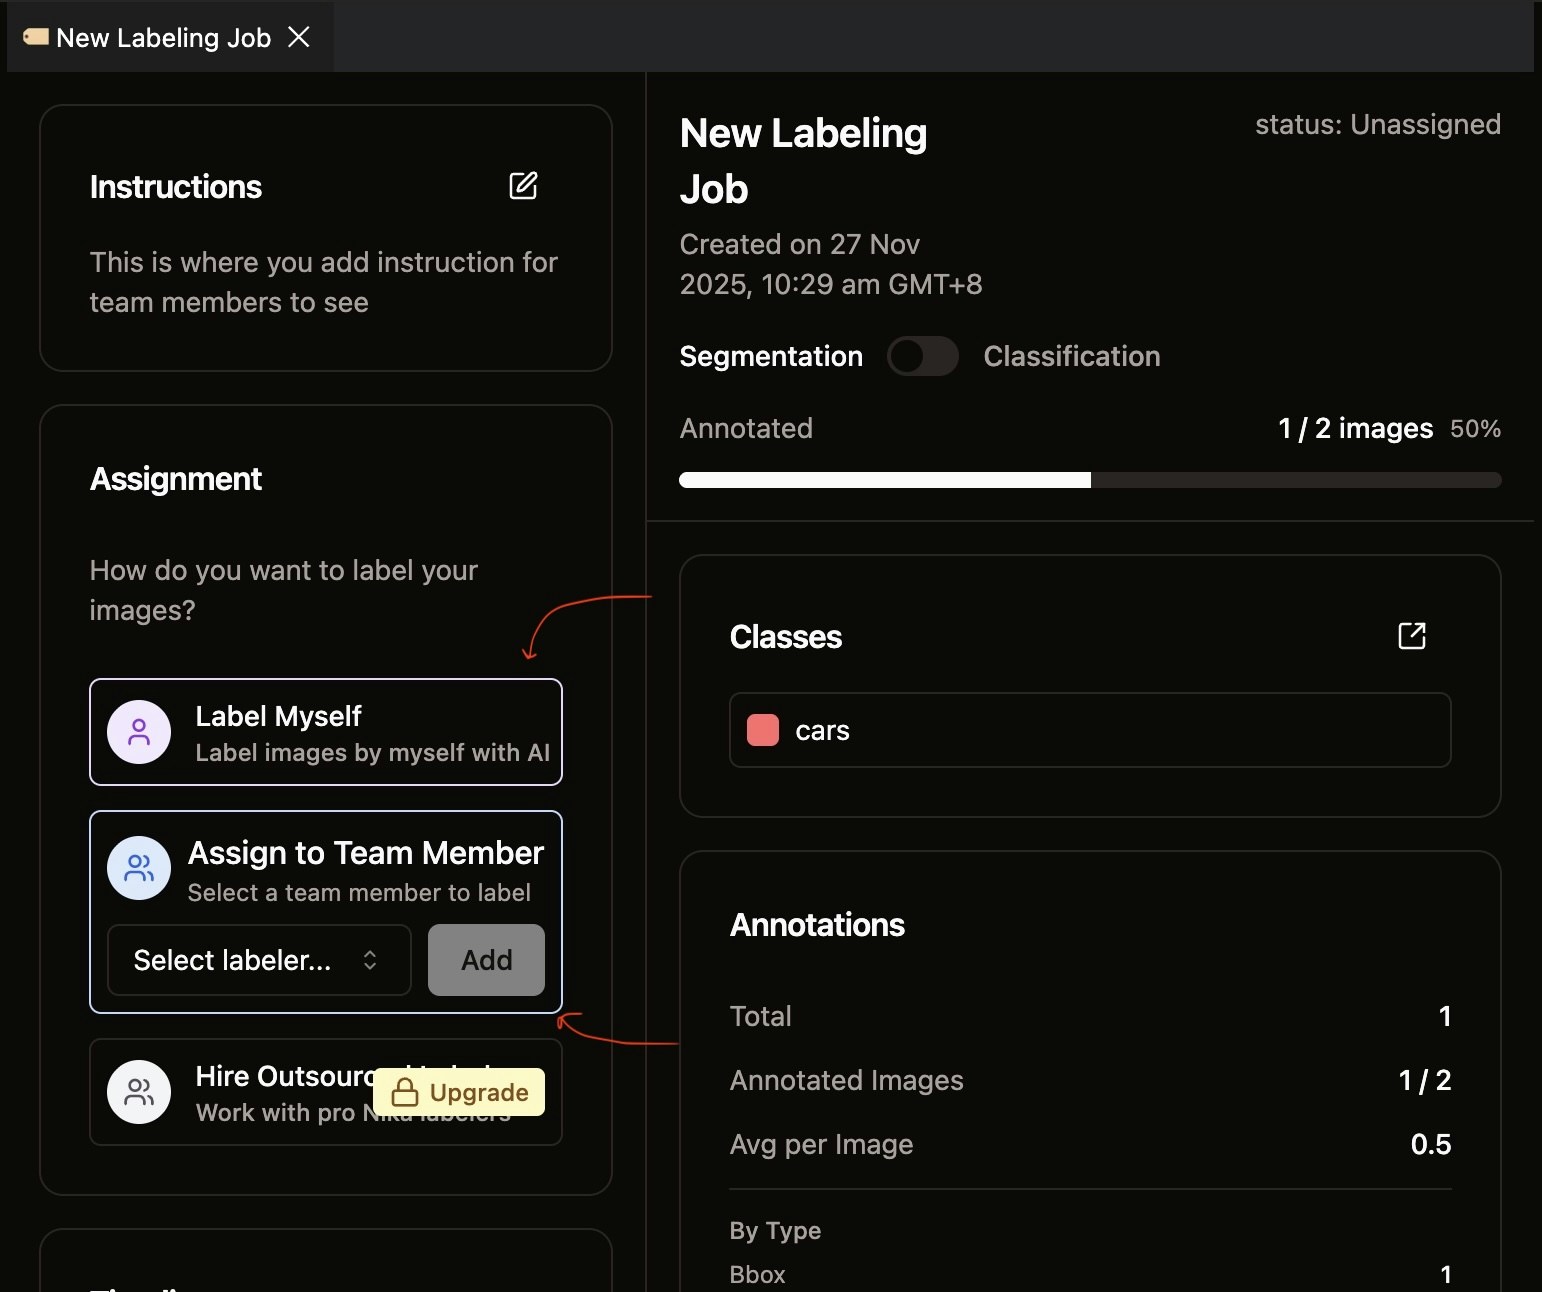 You can assign:
* **Yourself** as the labeler
* **Other team members** who have EDITOR access to the workspace
After making an assignment, the job status will automatically update from **UNASSIGNED** to **ANNOTATING**.
## Step 3: Manage Existing Assignments
Each assigned user has management options available on the right side of their assignment entry.
You can assign:
* **Yourself** as the labeler
* **Other team members** who have EDITOR access to the workspace
After making an assignment, the job status will automatically update from **UNASSIGNED** to **ANNOTATING**.
## Step 3: Manage Existing Assignments
Each assigned user has management options available on the right side of their assignment entry.
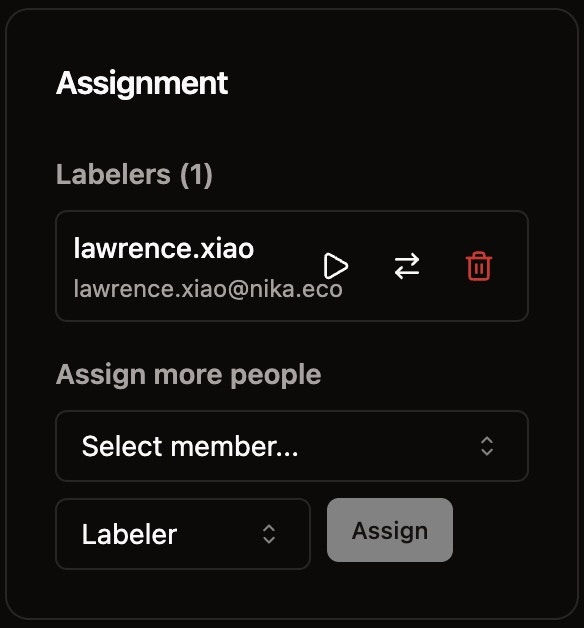 You can:
* **Switch Role**: Click the switch icon to toggle between **Labeler** and **Reviewer** roles
* **Remove Assignment**: Click the trash icon to remove the user from this job
## Step 4: Add More Assignments with Different Roles
You can assign multiple users to the same job with different roles using the select dropdown.
You can:
* **Switch Role**: Click the switch icon to toggle between **Labeler** and **Reviewer** roles
* **Remove Assignment**: Click the trash icon to remove the user from this job
## Step 4: Add More Assignments with Different Roles
You can assign multiple users to the same job with different roles using the select dropdown.
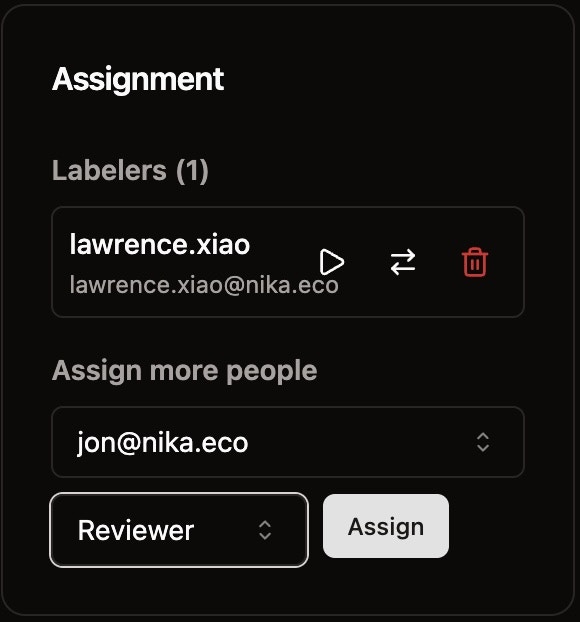 Use the dropdown to:
* Assign additional labelers to distribute the workload
* Assign reviewers to quality-check annotations
* Mix roles as needed for your workflow
Once a user is assigned a role to this job, one can click the **play button** to start the labeling or reviewing task from the first image.
Happy labeling!
Use the dropdown to:
* Assign additional labelers to distribute the workload
* Assign reviewers to quality-check annotations
* Mix roles as needed for your workflow
Once a user is assigned a role to this job, one can click the **play button** to start the labeling or reviewing task from the first image.
Happy labeling!