> ## Documentation Index
> Fetch the complete documentation index at: https://docs.nikaplanet.com/llms.txt
> Use this file to discover all available pages before exploring further.
# Label on Images
> Learn how to annotate images using various drawing tools and keyboard shortcuts
Learn how to annotate images efficiently using drawing tools, keyboard shortcuts, and smart segmentation features.
## Step 1: Enter Drawing Mode
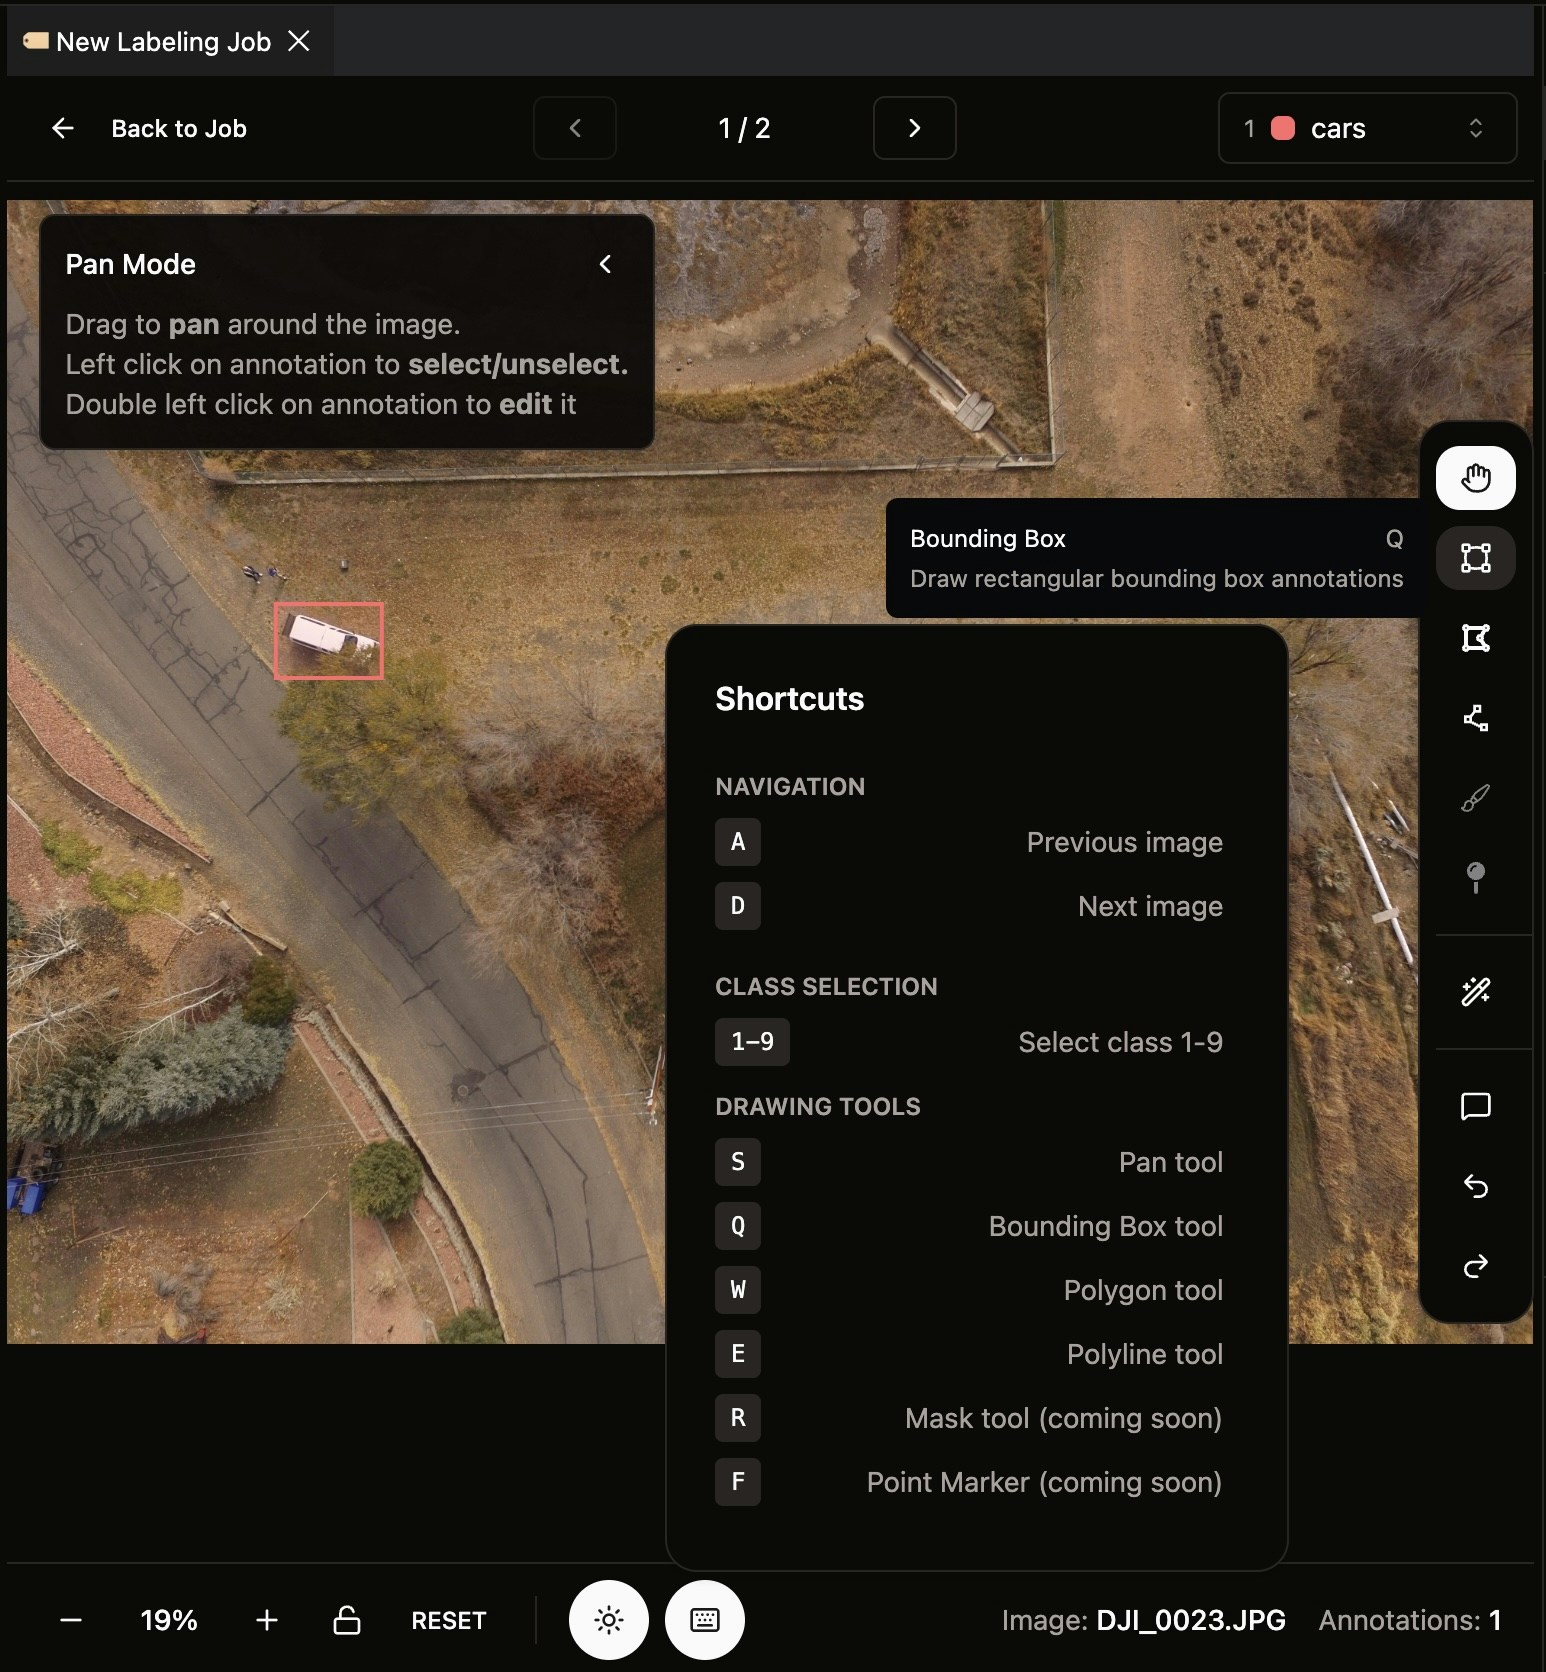
Double click on an image to enter drawing mode on that image.
 ### Keyboard Shortcuts
The following keyboard shortcuts are available to speed up your annotation workflow:
#### Navigation
| Shortcut | Action |
| -------- | -------------- |
| `A` | Previous image |
| `D` | Next image |
#### Class Selection (Segmentation Mode Only)
| Shortcut | Action |
| -------- | ---------------- |
| `1-9` | Select class 1-9 |
#### Drawing Tools
| Shortcut | Action |
| -------- | ------------------------------------- |
| `S` | Pan tool |
| `Q` | Bounding Box tool (Segmentation mode) |
| `W` | Polygon tool (Segmentation mode) |
| `E` | Polyline tool (Segmentation mode) |
| `R` | Mask tool (To be confirmed) |
| `F` | Point Marker (To be confirmed) |
| `X` | Smart Segmentation |
| `C` | Comment tool |
#### Actions
| Shortcut | Action |
| ----------- | ---------------------------------------------- |
| `⌘Z` | Undo |
| `⌘⇧Z` | Redo |
| `Enter` | Finish drawing / Accept (Segmentation mode) |
| `Esc` | Cancel / Reset to Pan |
| `Backspace` | Delete selected annotation (Segmentation mode) |
## Step 2: Switch Between Classes
In segmentation jobs, you can click the dropdown at top right of the drawing page to switch between classes for your current annotation.
### Keyboard Shortcuts
The following keyboard shortcuts are available to speed up your annotation workflow:
#### Navigation
| Shortcut | Action |
| -------- | -------------- |
| `A` | Previous image |
| `D` | Next image |
#### Class Selection (Segmentation Mode Only)
| Shortcut | Action |
| -------- | ---------------- |
| `1-9` | Select class 1-9 |
#### Drawing Tools
| Shortcut | Action |
| -------- | ------------------------------------- |
| `S` | Pan tool |
| `Q` | Bounding Box tool (Segmentation mode) |
| `W` | Polygon tool (Segmentation mode) |
| `E` | Polyline tool (Segmentation mode) |
| `R` | Mask tool (To be confirmed) |
| `F` | Point Marker (To be confirmed) |
| `X` | Smart Segmentation |
| `C` | Comment tool |
#### Actions
| Shortcut | Action |
| ----------- | ---------------------------------------------- |
| `⌘Z` | Undo |
| `⌘⇧Z` | Redo |
| `Enter` | Finish drawing / Accept (Segmentation mode) |
| `Esc` | Cancel / Reset to Pan |
| `Backspace` | Delete selected annotation (Segmentation mode) |
## Step 2: Switch Between Classes
In segmentation jobs, you can click the dropdown at top right of the drawing page to switch between classes for your current annotation.
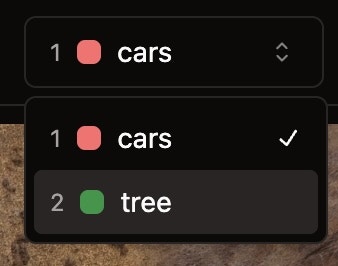 This allows you to quickly change the class you're annotating without interrupting your workflow.
## Step 3: Draw Polygons
In polygon mode, you can create precise annotations by clicking to add points.
This allows you to quickly change the class you're annotating without interrupting your workflow.
## Step 3: Draw Polygons
In polygon mode, you can create precise annotations by clicking to add points.
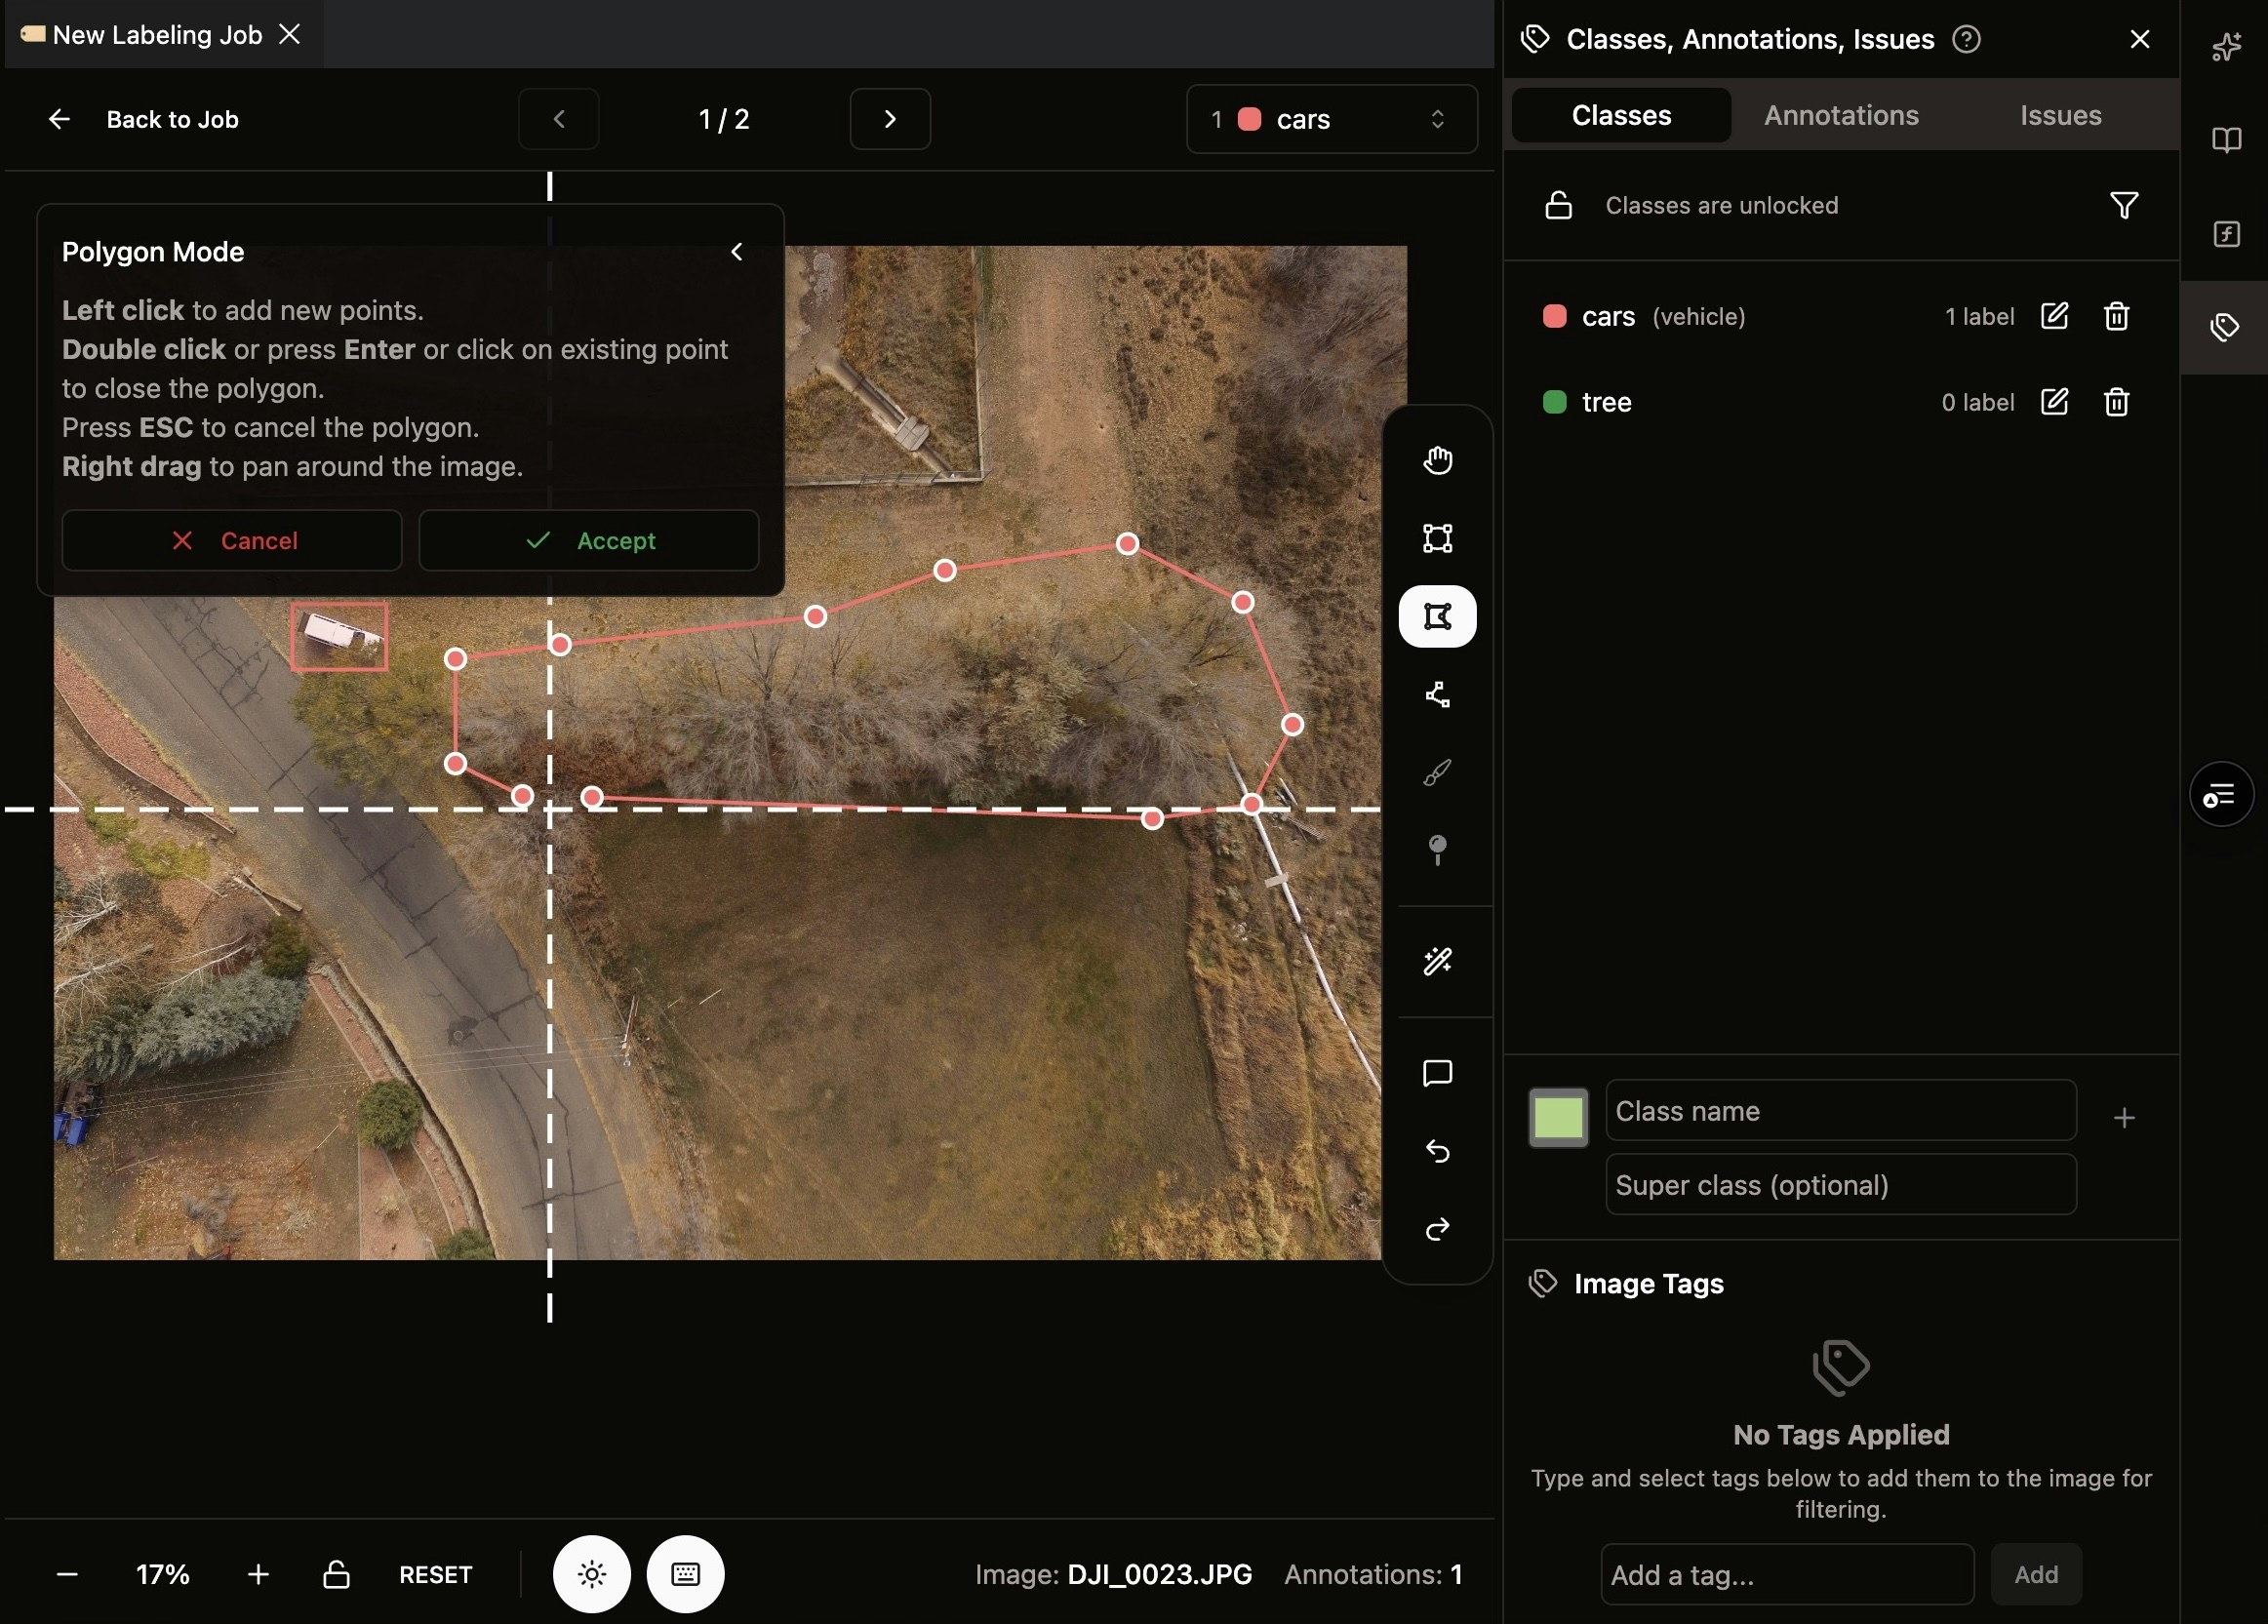 To draw a polygon:
* **Click** to add a point
* **Double click** or **click again on an existing node** to finalize the polygon drawing
## Step 4: Use Smart Segmentation
Nika's smart segmentation tool uses SAM 2.0 from Meta for quick segmentation of parts of the image.
To draw a polygon:
* **Click** to add a point
* **Double click** or **click again on an existing node** to finalize the polygon drawing
## Step 4: Use Smart Segmentation
Nika's smart segmentation tool uses SAM 2.0 from Meta for quick segmentation of parts of the image.
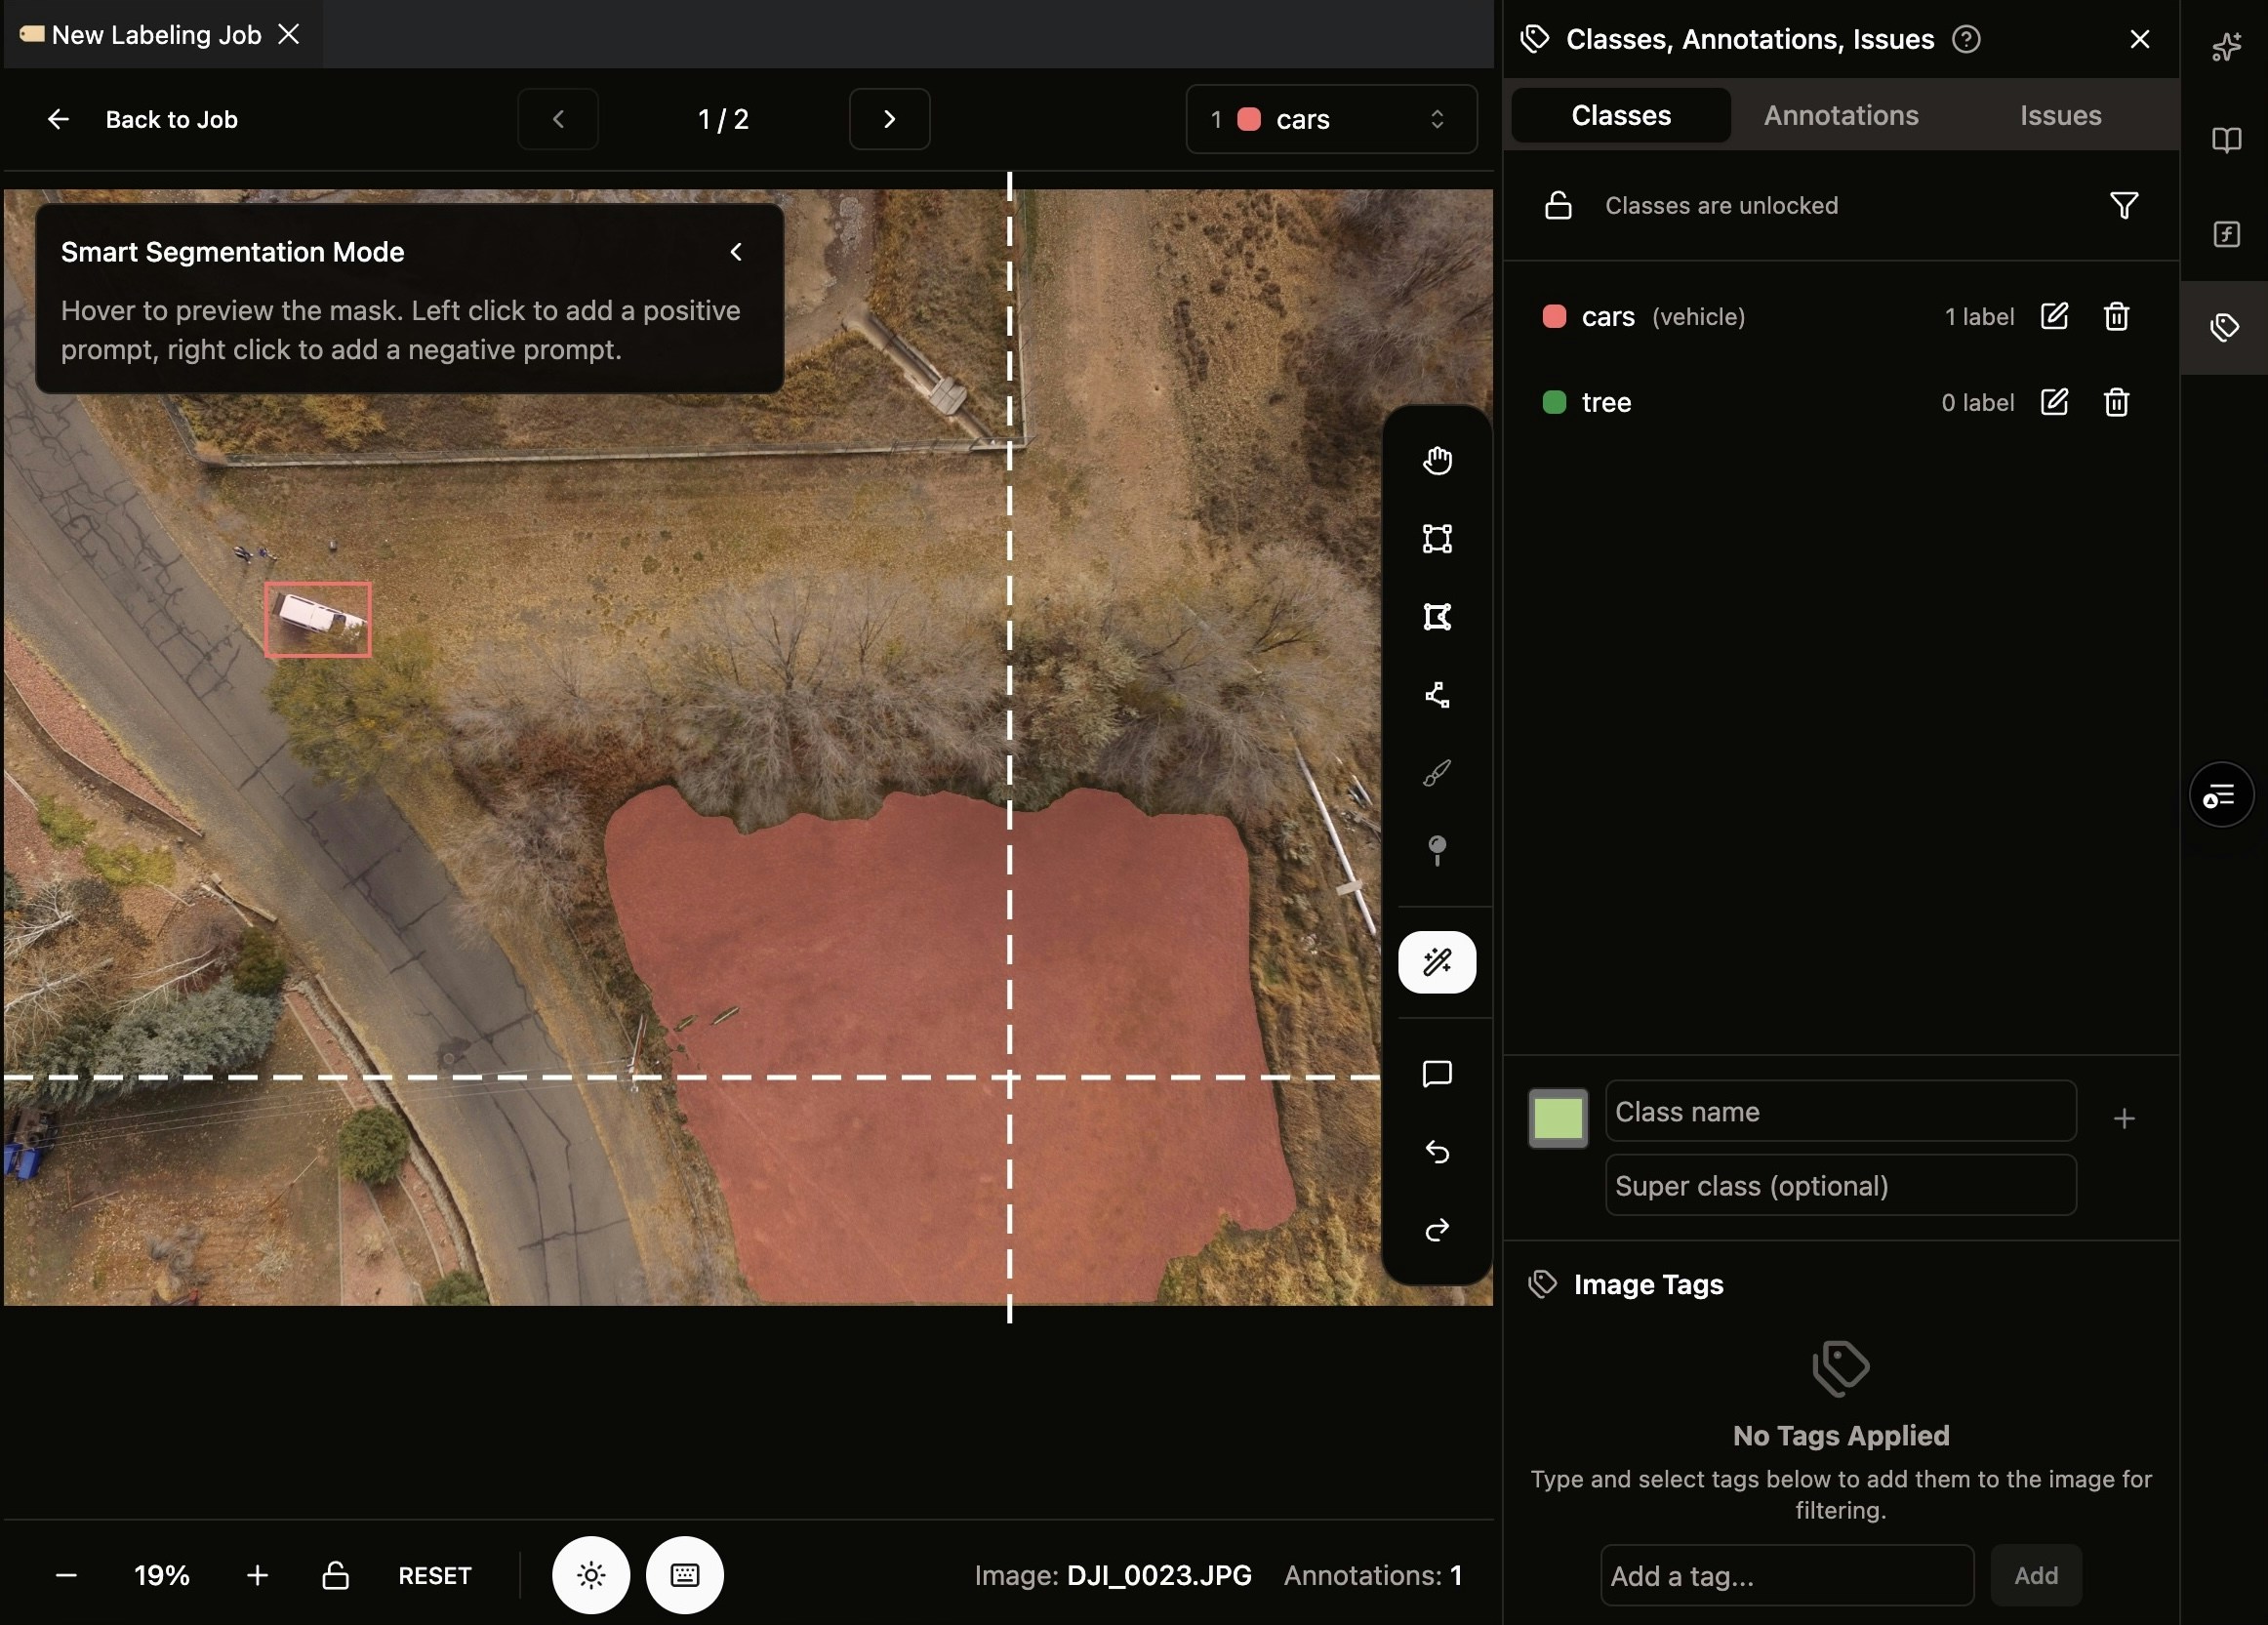 With smart segmentation, you can:
* Define the number of polygons allowed before finalizing
* Adjust the complexity/smoothness of boundary segmented
* Quickly segment complex objects with AI assistance
* Refine the generated polygons as needed
## Step 5: Submit for Review
Once you've finished annotating all images, you can submit your work for review.
With smart segmentation, you can:
* Define the number of polygons allowed before finalizing
* Adjust the complexity/smoothness of boundary segmented
* Quickly segment complex objects with AI assistance
* Refine the generated polygons as needed
## Step 5: Submit for Review
Once you've finished annotating all images, you can submit your work for review.
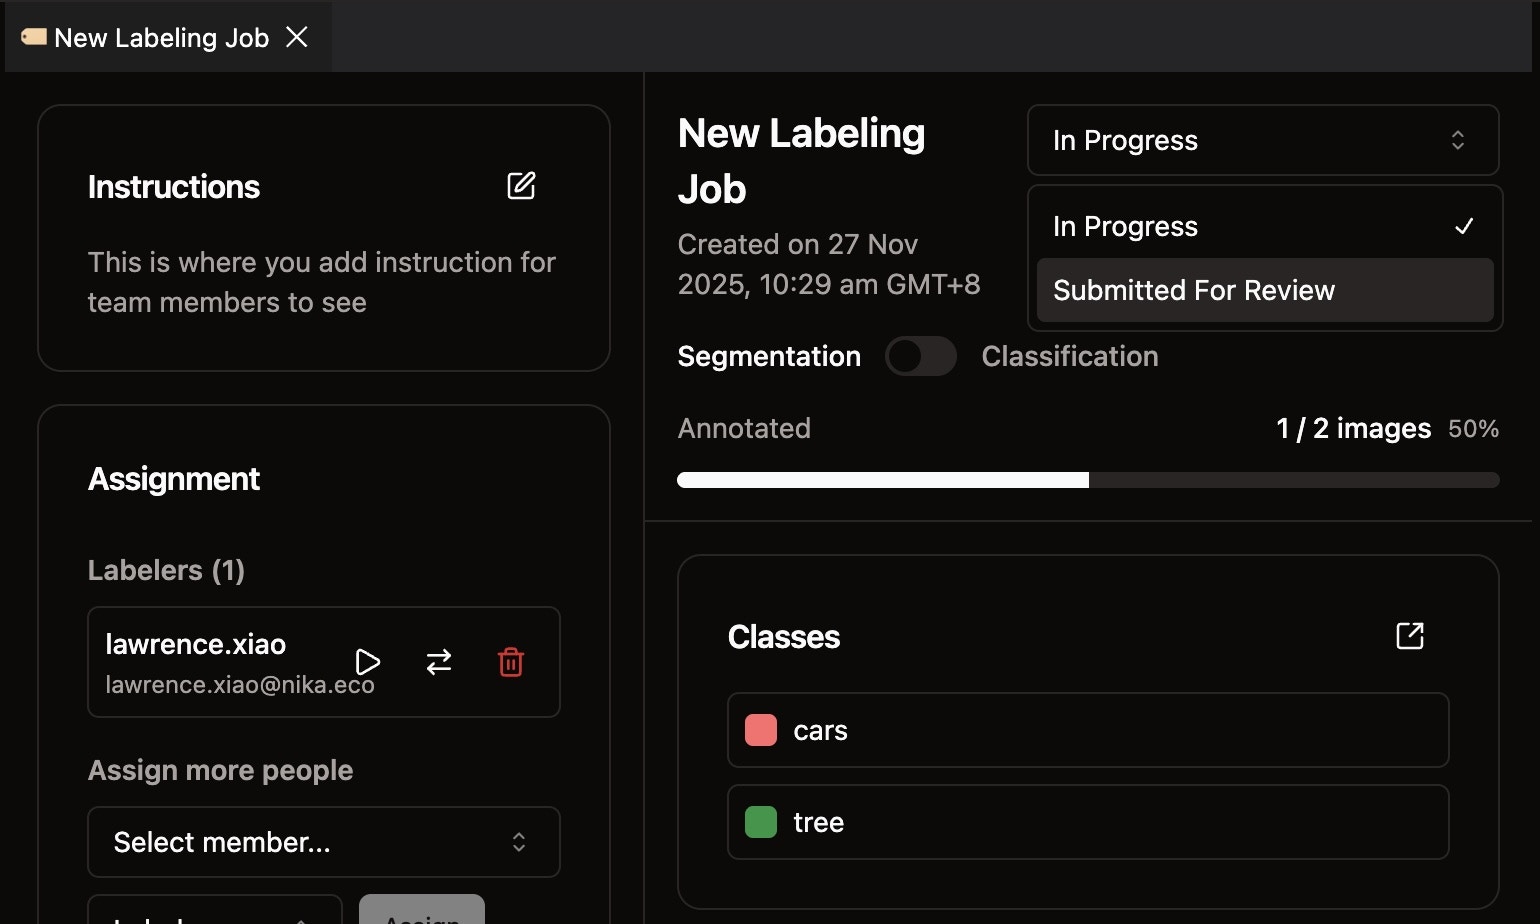 As a user assigned the labeler role:
1. Go back to the job page
2. Click the top right status select dropdown
3. Select **Submit for Review**
Happy labeling!
As a user assigned the labeler role:
1. Go back to the job page
2. Click the top right status select dropdown
3. Select **Submit for Review**
Happy labeling!