Pre-Installed Software
Available Configurations
All VM kernels come with:- GDAL 3.9.1: Geospatial Data Abstraction Library for raster and vector data
- CUDA 12.2: NVIDIA CUDA for GPU acceleration
- Python 3.10/3.11: Multiple Python versions available
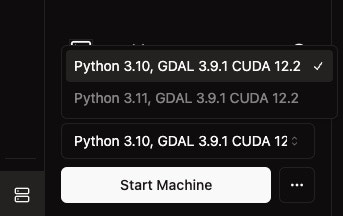
Kernel Selection
When starting your machine, you can choose from:- Python 3.10, GDAL 3.9.1 CUDA 12.2
- Python 3.11, GDAL 3.9.1 CUDA 12.2
- Python 3.10, GDAL 3.9.1 CUDA 12
Ready to Use
No Installation Required
- Pre-configured: All geospatial libraries are ready to use
- GPU Ready: CUDA drivers and libraries are installed
- Immediate Access: Start analyzing geospatial data right away
Direct Access
- Workspace Integration: Direct access to workspace files
- Large Dataset Support: Optimized for TB-PB sized geospatial data
- Performance Optimized: GPU acceleration for raster processing
Usage Examples
GDAL Operations
CUDA Acceleration
Next Steps
Now that you have GDAL and CUDA ready:- Start Analysis: Begin your geospatial analysis immediately
- Load Data: Access your workspace data files
- Use GPU: Leverage CUDA for accelerated processing
- Scale Up: Work with large geospatial datasets efficiently