Invite to Team
Inviting users to your team allows you to collaborate on projects, share resources, and manage access permissions collectively. This guide will walk you through the step-by-step process of inviting new team members using the NikaPlanet interface.Overview
Team invitations enable you to:- Add new collaborators to your workspace
- Assign appropriate permission levels
- Manage team access centrally
- Streamline collaboration workflows
How to Invite Users to Your Team
Step 1: Navigate to Settings
From your main workspace view, click on Settings in the left navigation sidebar.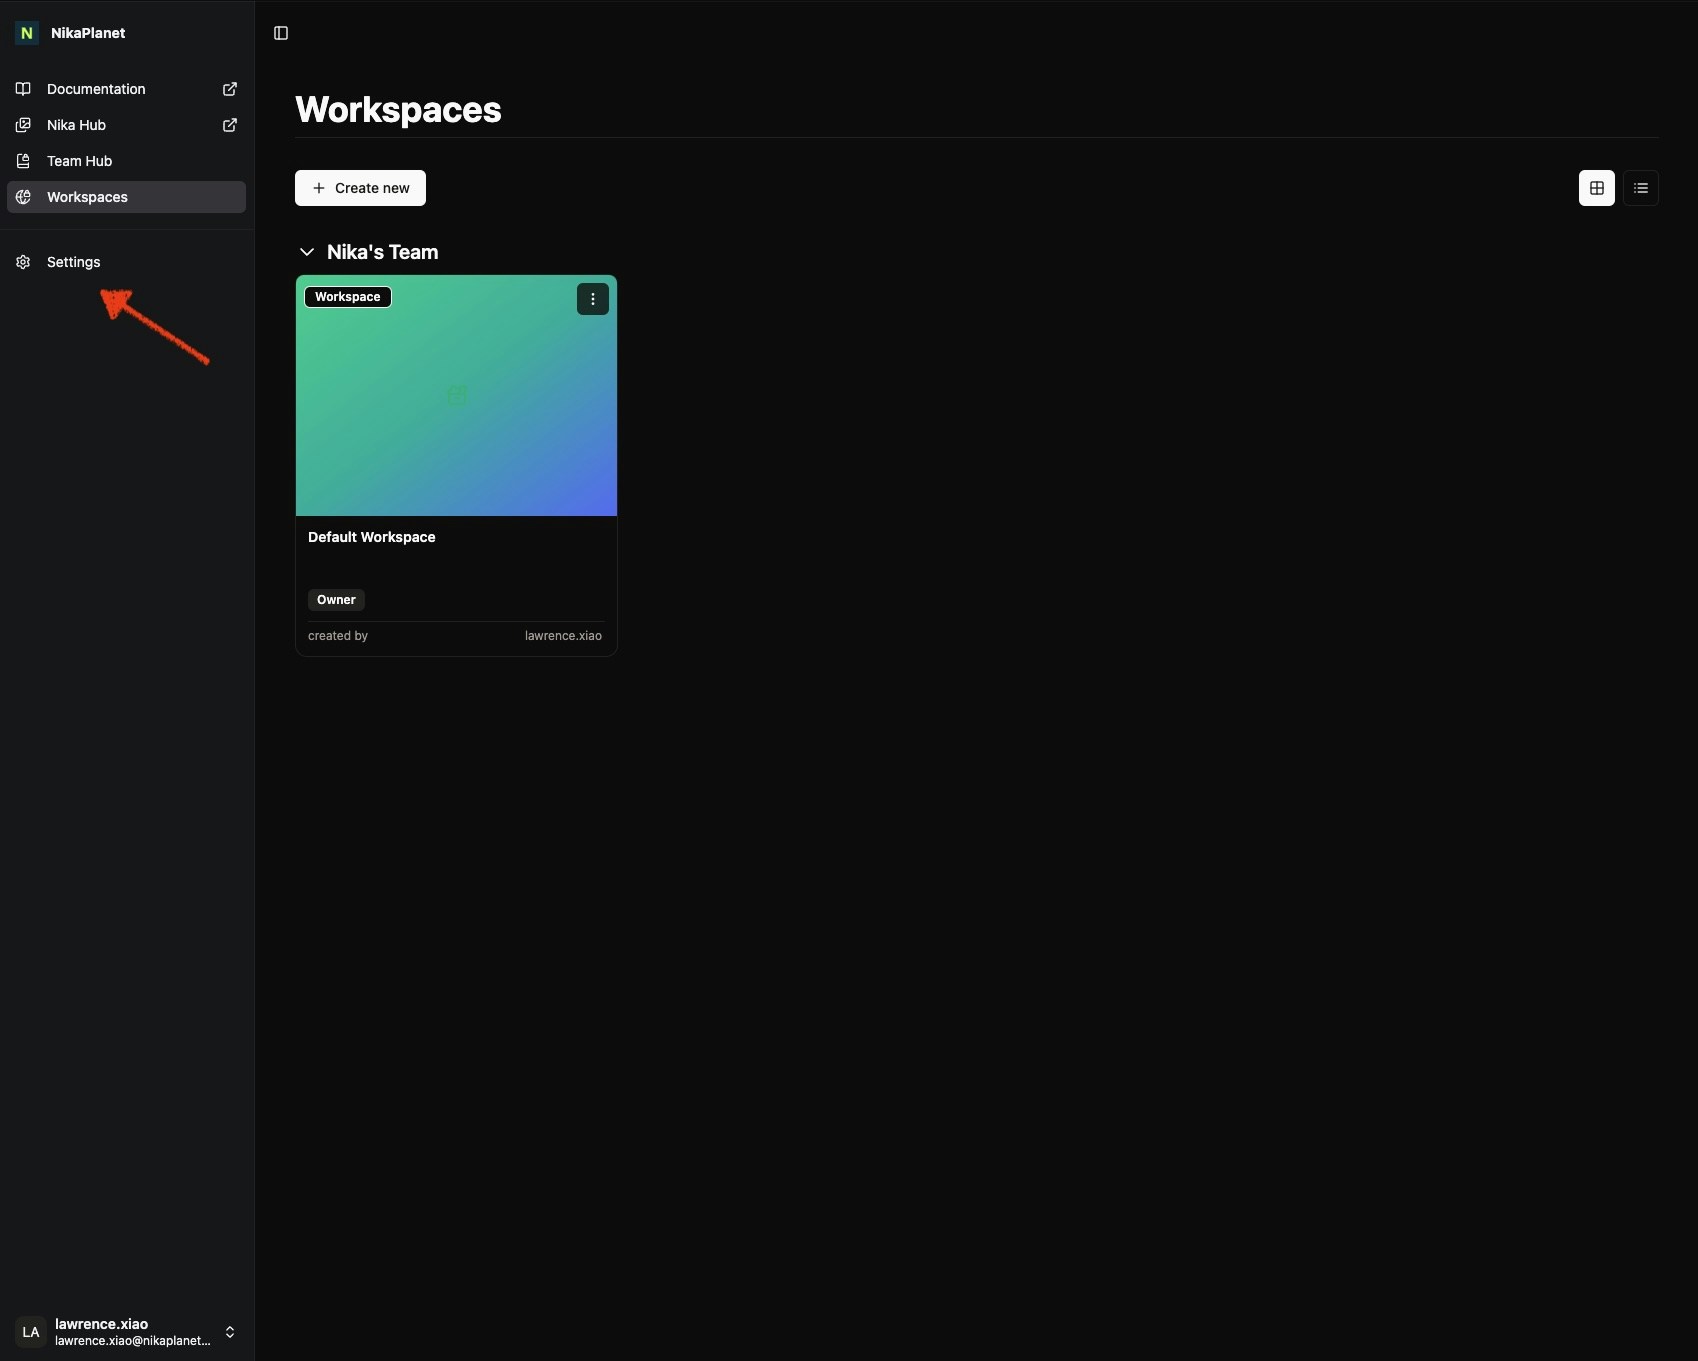
Step 2: Access Team Members
In the Settings section, you’ll see your team information in the left sidebar. Make sure you select the right team before clicking on Members under your team name to access the team members page.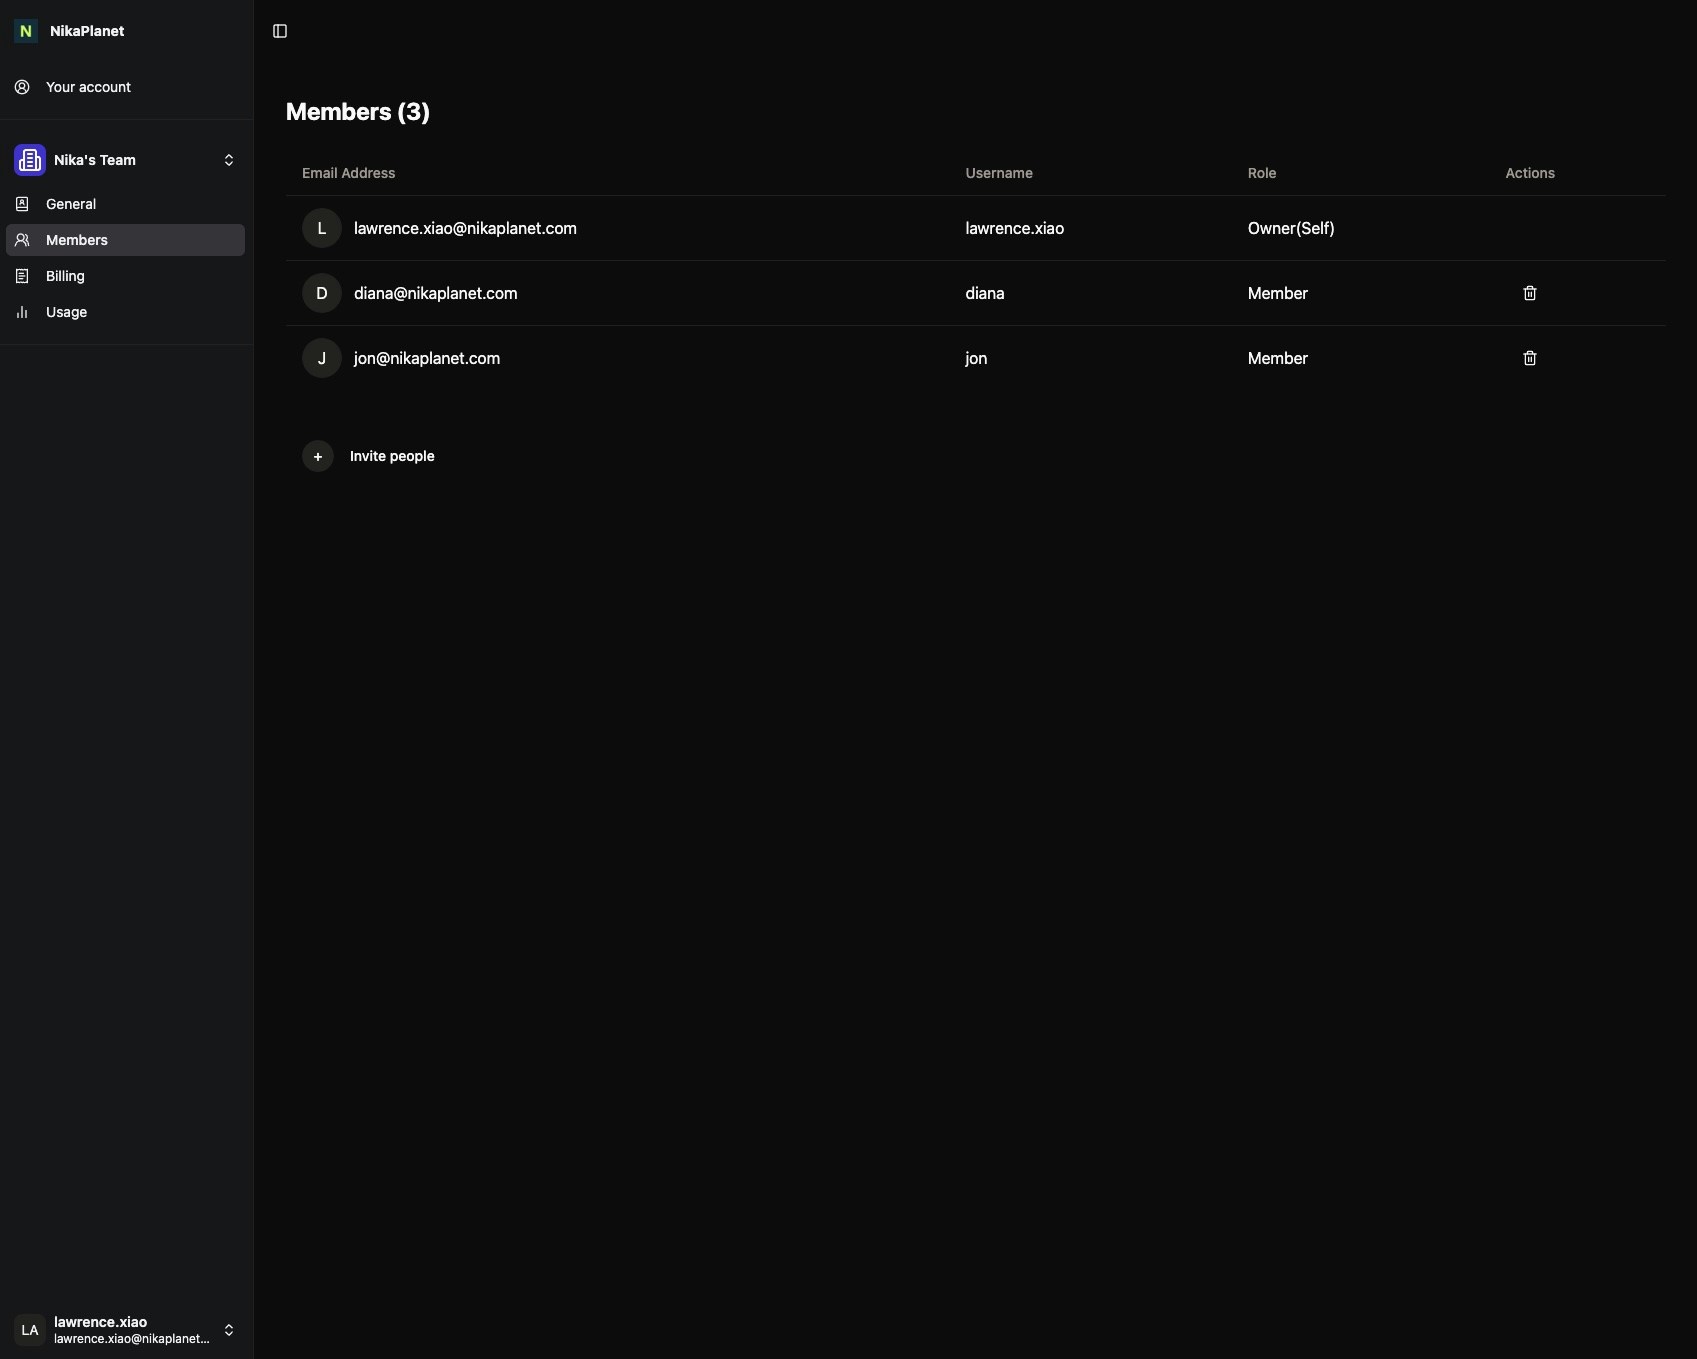
Step 3: Invite New Members
On the Members page, you’ll see a list of current team members. To add someone new, click the “Invite people” button below the member list.Step 4: Send Invitation
A dialog will open where you can enter the email address of the person you want to invite. Enter their email and click “Send request” to send the invitation.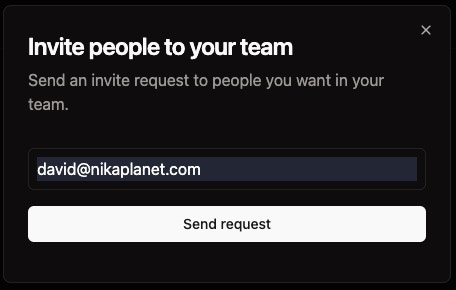
What Happens Next
Invitation Sent
Once you send the invitation:- The new member will appear in your Members list with a “Pending” status
- An email invitation will be sent to the invitee’s email address
- The invitation will expire in 7 days if not accepted
Invitee Receives Email
The person you invited will receive an email that looks like this: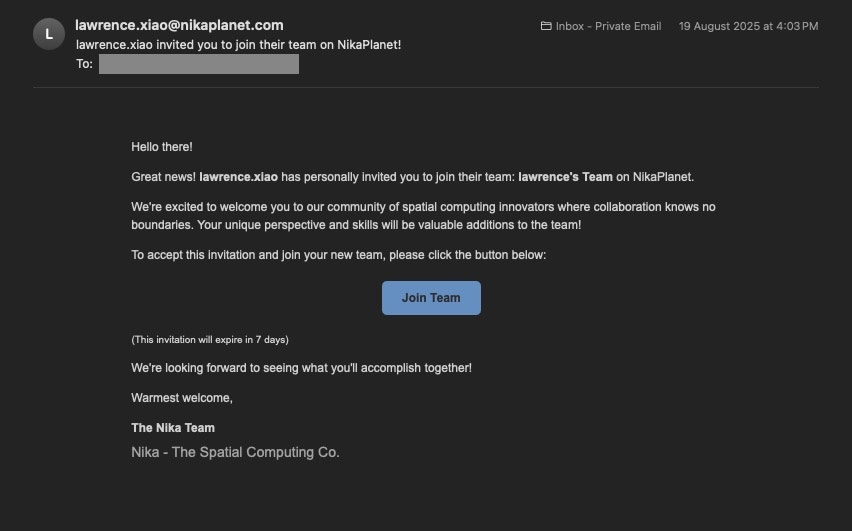
- A personalized invitation message
- A “Join Team” button to accept the invitation
- Information about the team they’re being invited to join
- Expiration details (7 days)
Invitation Acceptance
When the invitee clicks the “Join Team” button in their email:- They’ll be redirected to create or sign into their NikaPlanet account
- Once accepted, their status will change from “Pending” to “Active” in your Members list
- They’ll have immediate access to the team resources based on their assigned role
Managing Team Members
Current Members
Your Members page shows all team members with their:- Email address
- Username
- Role (Owner, Member, etc.)
- Actions available (delete, change role, etc.)
Pending Invitations
Track the status of sent invitations:- Pending: Invitation sent but not yet accepted
- Active: User has joined the team
- Expired: Invitation has expired and needs to be resent
Resending Invitations
If an invitation expires or the user doesn’t respond, you can resend the invitation from the Members management interface.Permission Levels
Team members typically have these access levels:- Owner: Full access to team settings and member management
- Member: Can access team resources and collaborate on projects
- Custom: Tailored permissions based on specific needs only for Enterprise License users
Best Practices
- Clear Communication: The invitation email automatically includes context about your team
- Appropriate Permissions: Start with standard member access and adjust as needed
- Regular Review: Periodically review team member access and permissions
- Follow Up: Check with invitees if they haven’t accepted within a few days
Workspace Access and Team Permissions
Creating Workspaces Under Teams
When you create a new workspace using the “Create New Workspace” dialog, it will automatically be associated with the selected team and default to giving “Can edit” access to all team members.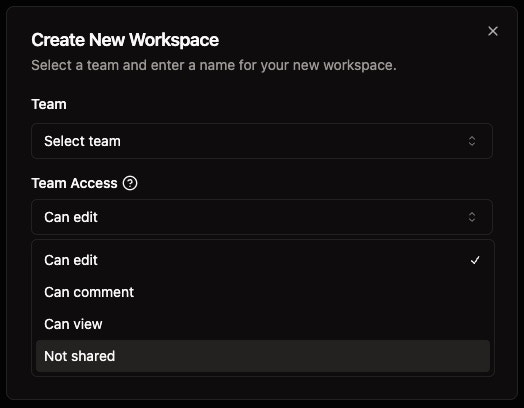
- Can edit: Team members can modify and manage the workspace
- Can comment: Team members can view and add comments
- Can view: Team members have read-only access
- Not shared: Other members of the team will not be able to access this workspace
Managing Workspace Access After Creation
Once a workspace is created, you can modify team access permissions by:- Opening the Share Dialog: Click the share button in the top right corner of any workspace
- Accessing “People with access”: Navigate to the “People with access” section
- Modifying Team Permissions: Change the access level for “Nika’s Team” or individual team members
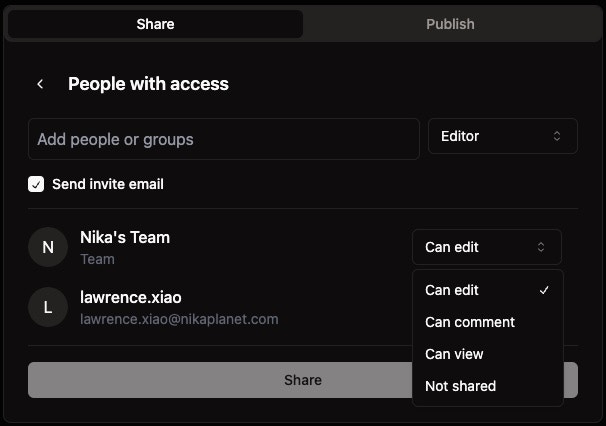
- Can edit: Full editing and management capabilities
- Can comment: Ability to view and add comments
- Can view: Read-only access to workspace content
- Not shared: No access to the workspace
- Send invite email: Automatically notify team members of access changes
- Individual member management: Set different permissions for specific team members vs. the entire team
Troubleshooting
Common Issues
- Invitation Not Received: Ask the invitee to check their spam/junk folder
- Permission Errors: Ensure the user has the correct role assignments
- Team Access: Verify the user is assigned to the correct team(s)
Getting Help
If you encounter issues with team invitations, contact your team administrator or reach out to NikaPlanet support for assistance.Next Steps
After successfully inviting team members:- Invite to Workspace - Learn how to invite users to specific workspaces