Learn how to add data layers to your NikaMap using multiple methods. You can drag files from the Files panel, upload from your desktop, or use the right-click context menu.
Step 1: Prepare Your Data
Before adding layers, make sure your data is ready:
- Shapefile Components: .shp, .shx, .dbf, .prj, .cpg, .fix, .sbn, .sbx, .fbn, .fbx, .ain, .aih, .atx, .qix, .qmd
- GeoPackage: .gpkg (modern, efficient vector format)
- FlatGeobuf: .fgb (fast, compressed vector format)
- GeoJSON: .geojson, .json (web-friendly vector format)
- KML/KMZ: .kml, .kmz (Google Earth format)
- GML: .gml (Geography Markup Language)
- GeoParquet: .gpq, .parquet, .geoparquet (columnar format)
- CSV: .csv (with coordinate columns)
- Parquet: .parquet (efficient columnar storage)
- GeoParquet: .geoparquet (spatial extension of Parquet)
- GeoTIFF: .tif, .tiff, .TIF, .TIFF (high-quality raster format)
- JPEG: .jpg, .jpeg, .JPG, .JPEG (compressed image format)
File Requirements
- Size Limits: Files up to several GBs for raster and up to 500 MBs for vector are supported
- Coordinate System: Data should have proper spatial reference that can be converted to ESPG:3857 Mercator that NikaMap uses
- File Structure: Ensure files are not corrupted or lack of georeferencing (i.e. no lon lat coordinates at all)
Step 2: Upload Files to Your Opened NikaMap
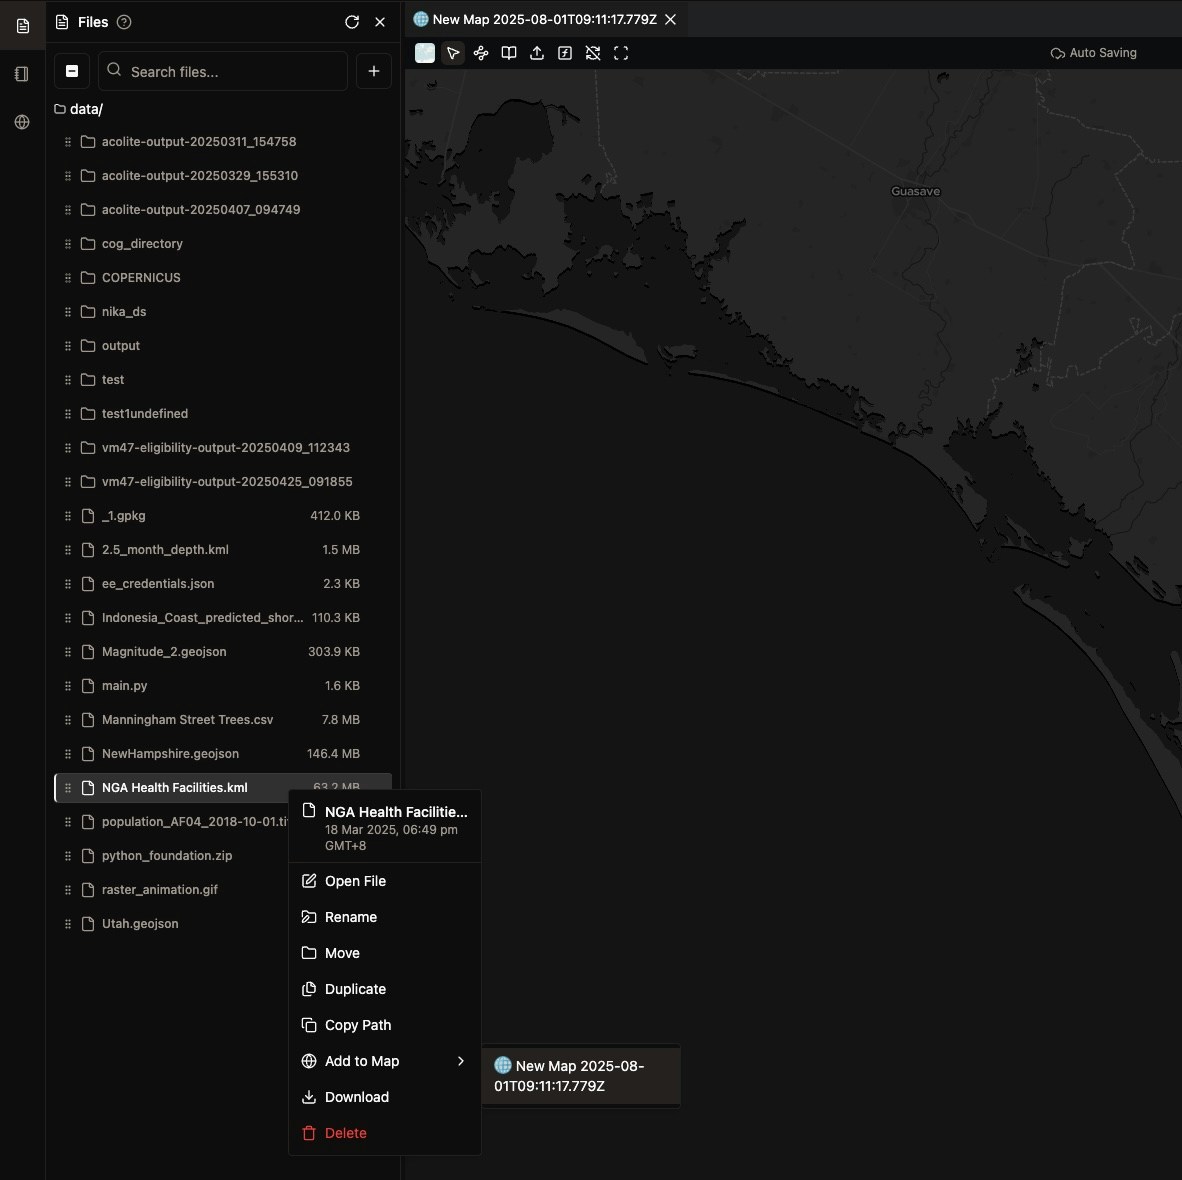
Method 1: Upload via Existing Files in NikaWorkspace
- Open Files Panel: Click “Files” in the left sidebar
- Multiselect Files: Hold Shift/Cmd/Ctrl on your keyboard while selecting multiple files
- Right Click: Right click on one of the selections and click Add to Map with the correct destination map selected
- Wait for Processing: Files will be processed before adding to the map automatically. Larger files will take longer to come back because of network transimission despite encrypted
Method 2: Drag and Drop Files from NikaWorkspace
Same as Method 1, just via dragging
Note: Make sure you drop to the centered section of the map, if not it will be treated as opening it as a text file
Method 3: Drag from Desktop
- Drag Files: Drag files directly from your desktop to the map
- Auto-upload: Files will be uploaded and preprocessed before adding to the map automatically
- Click Upload: Left-click on Upload button from NikaMap’s top bar
- Select Files: Choose the relevant files from your local file system to upload as layers
- Add to Current Map: Add to the currently active map
- Add to Specific Map: Choose from a list of your maps
- Add as New Layer: Create a new layer (default behavior)
- Replace Existing: Replace an existing layer with the same name
Step 4: Layer Reordering
Sort Added Layers
- Layers Panel: Look for the layers panel on the left side. If you dont see it, make sure a map panel is selected in the middle with left sidebar opening for list of maps
- Layer List: All added layers will appear in the list at bottom left
- Layer Reordering: Drag and drop a layer to make them appear on top or below. The ones at bottom will show up on top in the map
Step 5: Layer Attribute Table
View Layer Properties
- Right-click Layer: Right-click on a vector layer to open
attributes in a table format
- Select features: As each row of entry in the table represents one geometry feature on map, selecting it in table will also select it on map
- Update Information: Data field update in the table will immediately be saved as well, just like the geometry features on map
Layer Controls
- Visibility Toggle: Click the eye icon on a single layer to show/hide layers
- Group Visibility: Click the same eye icon on a group of layer with folder icon to show/hide all descendent layers
- Layer Properties: Right-click on a layer to access styling options
- Vector Functions: Right-click on a vector layer to access function options
- Delete Layer/Group: Right-click on a layer or group node to delete them instantly from the map
Step 6: Copy Features to a New Layer
You can copy features from one vector layer into a brand-new layer — either all features at once, or only a selected subset.
Copy All Features
- Right-click on a vector layer in the layers panel
- Select “Copy all features to new layer”
- A new layer named “Copy of [original name]” appears in the layer list with all features duplicated
Copy Selected Features
- Select the vector layer by clicking on it in the layers panel
- Select features on the map by clicking individual features, or multi-select from the attribute table
- Right-click on the layer in the layers panel
- The menu item now shows “Copy N feature(s) to new layer” where N is the number of selected features
- Click it to create a new layer containing only the selected features
- Your selection is automatically cleared after the copy completes
This is useful for splitting a large dataset into smaller layers based on specific features of interest, or for isolating a subset of features to style or export independently.
Step 7: Customize Layer Appearance
Access Layer Styling
- Vector Layer: Go to Vector Layer Stylings to view all styles currently supported
- Raster Layer: Go to Raster Layer Stylings to view all visualizations currently supported
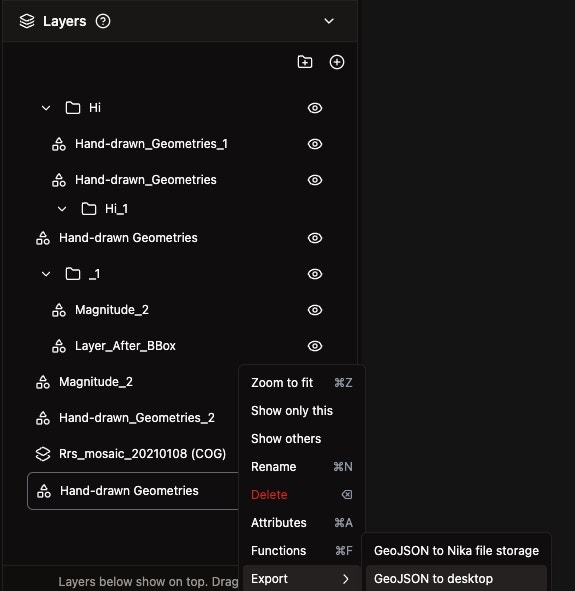
Step 8: Export Layers from Map
Different Export options
- Single Vector Layer: Right-click to export as GeoJson from map. Choose whether to desktop or to NikaWorkspace file storage
- Group of Layers: Right-click to export as GeoPackage from map. Choose whether to desktop or to NikaWorkspace file storage
Step 9: Troubleshooting Common Issues
Layer Not Appearing
- Check Visibility: Ensure the layer is visible (eye icon)
- Zoom to Layer: Double-click to zoom to layer from the layer list at bottom left
- Coordinate System: Verify the data has proper spatial reference
- File Format: Confirm the file format is supported and its layer appears in the layer list at bottom left after dragged to map
- Large Files: Consider simplifying large datasets
- Too Many Layers: Remove unnecessary layers
- Browser Cache: Refresh the page if needed
- Network: Check your internet connection
Styling Problems
- Reset Styling: Use the reset button in styling panel
- Default Colors: Apply default color schemes
- Layer Order: Ensure layers are in the correct order
Tips and Best Practices
Layer Management
- Logical Ordering: Arrange layers in logical order (background to foreground)
- Naming Convention: Use consistent naming for layers
- Grouping: Consider grouping related layers
- Cleanup: Remove unused layers regularly
- File Size: Keep individual files under reasonable size limits
- Simplification: Simplify complex geometries when possible
- Caching: Allow time for layers to cache properly
- Browser: Use a modern browser for best performance
Next Steps
Now that you’ve added layers to your map:
- Style Your Layers: Customize the appearance of your data
- Work with Vector Layers: Learn about Vector Layer in NikaMap
- Collaborate: Explore Collaborative Mapping
- Publish: Learn how to Publish Your Map
Happy mapping!