Configuring Input Nodes
Setting Input Sources
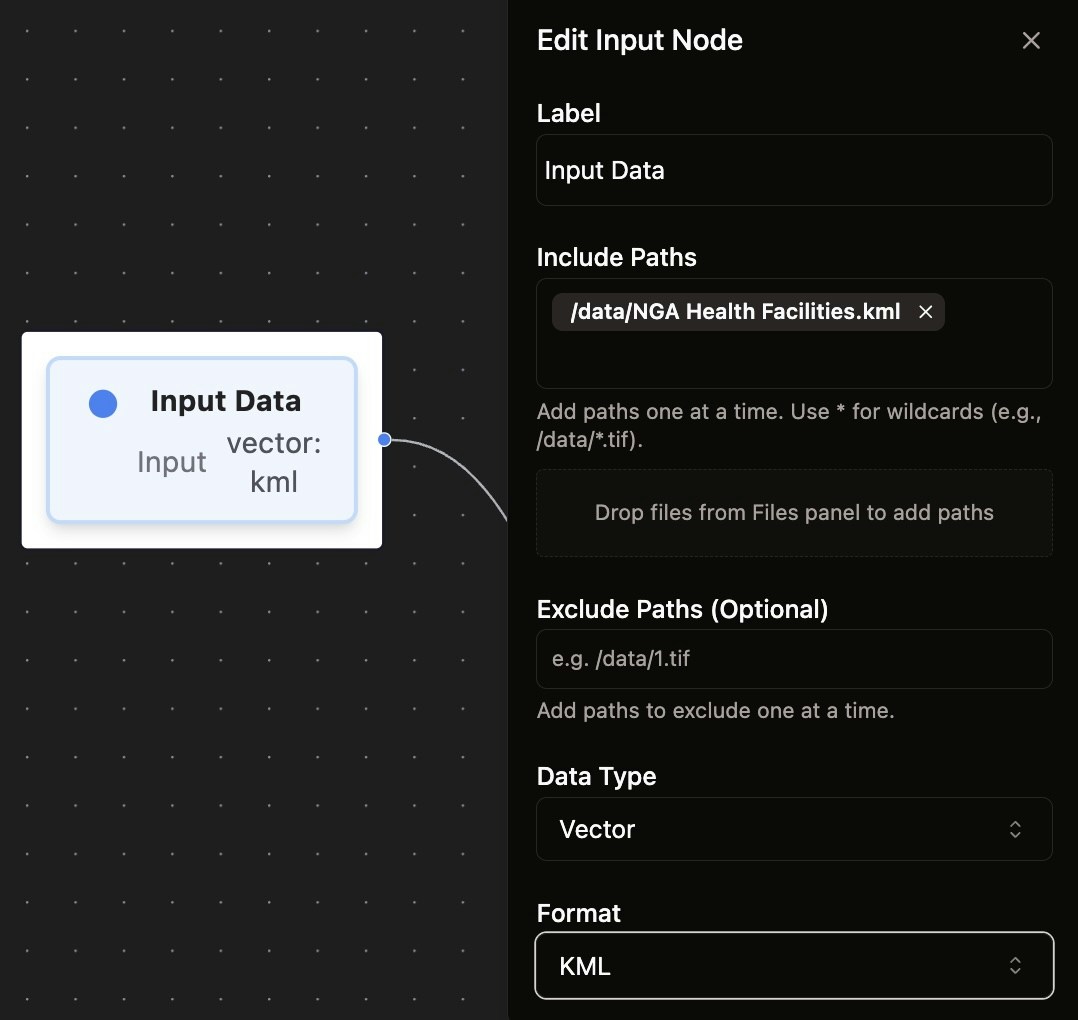
- Click on an Input Data node to open its configuration panel
- In the Include Paths section, add your data source paths:
- All paths must start with
/data/prefix - Use wildcards (e.g.,
/data/*.tif) to include multiple files - Add paths one at a time
- Double click an existing path to modify the text
- All paths must start with
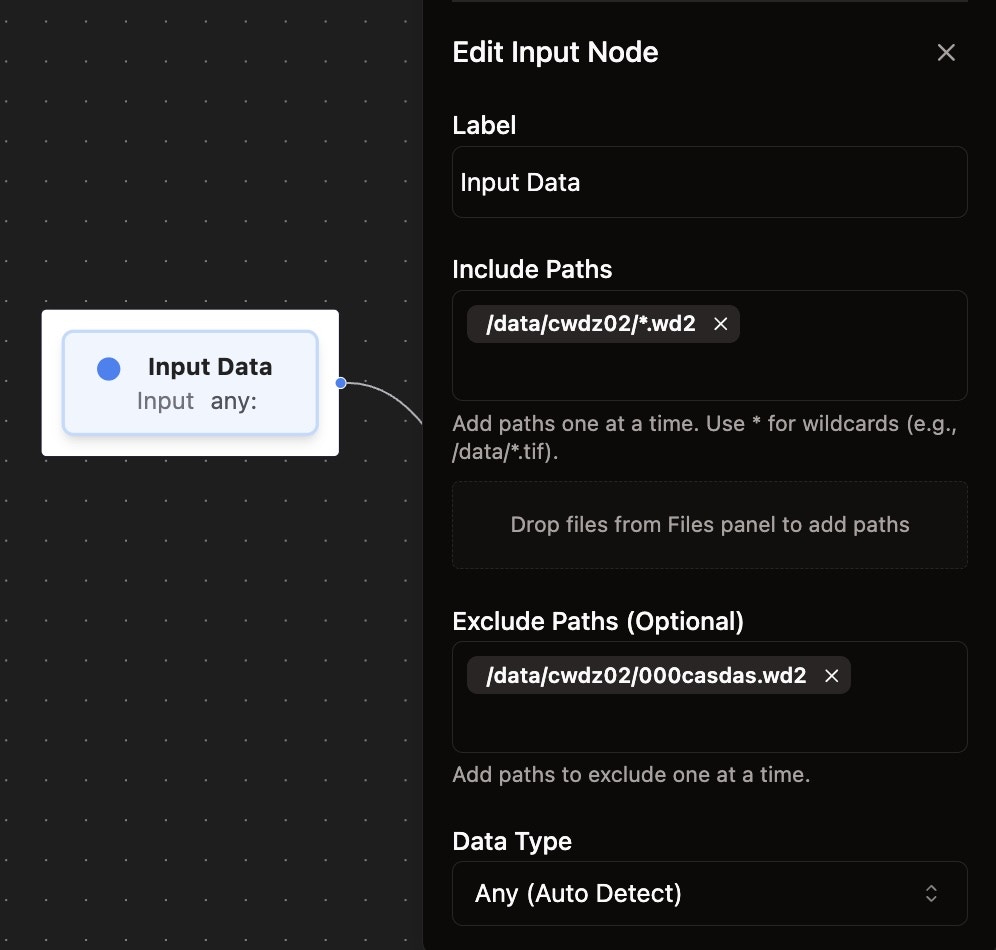
Using Exclude Paths
To refine your input scope:- In the Exclude Paths (Optional) section, specify files to exclude
- This is useful when using wildcards - you can include a broad pattern and then exclude specific unwanted files
- Example: Include
/data/cwdz02/*.wd2but exclude/data/cwdz02/000casdas.wd2
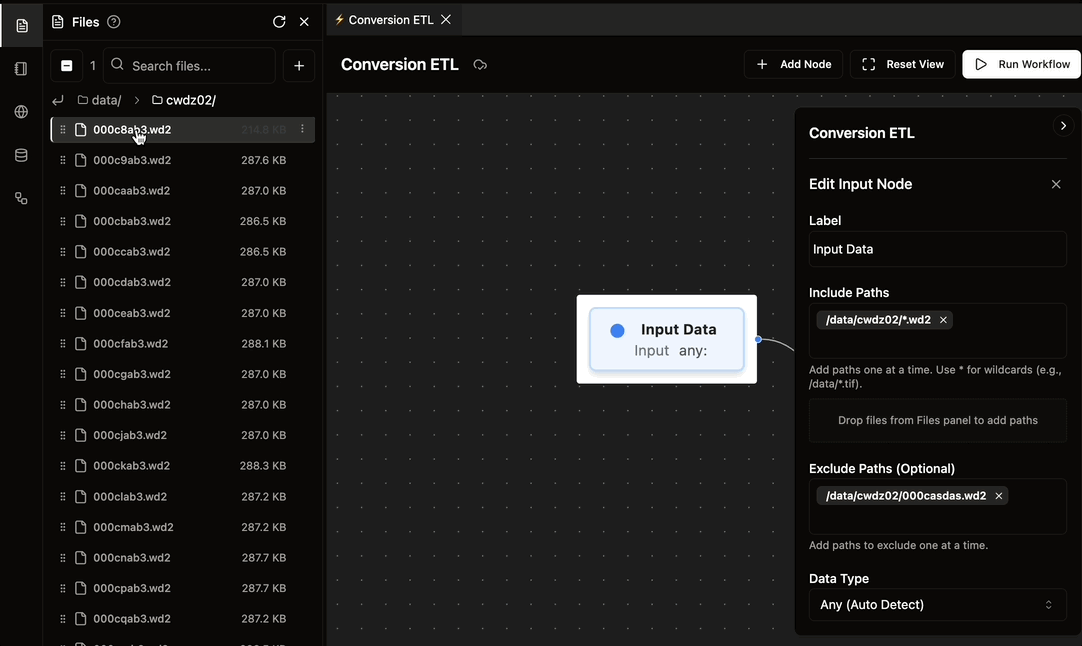
[Advanced] Drag and Drop from Files Panel
For faster path entry:- Open the Files panel on the left
- Select multiple files from the data lake filesystem
- Drag and drop them directly into the input node panel’s dropzone
- This automatically adds all selected file paths that are valid for currently selected input data format
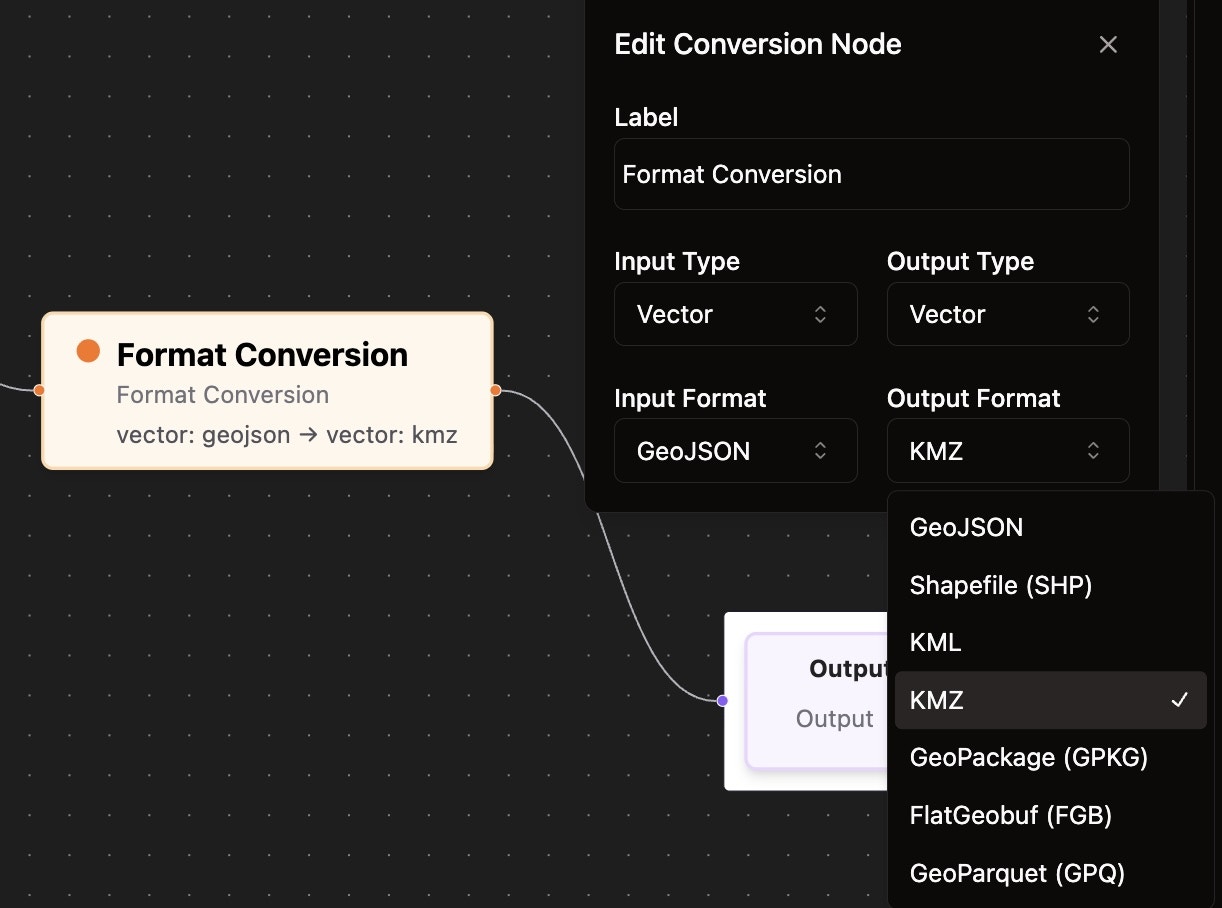
Configuring Conversion Nodes
Setting Input and Output Formats
- Click on a Format Conversion node
- Configure the conversion parameters:
- Input Type - Select the data type (Vector, Raster, etc.)
- Input Format - Choose the source format (GeoJSON, KML, etc.)
- Output Type - Select the target data type
- Output Format - Choose the destination format (KMZ, Shapefile, etc.)
- Check out NikaFlow page for latest supported input and output data type/formats
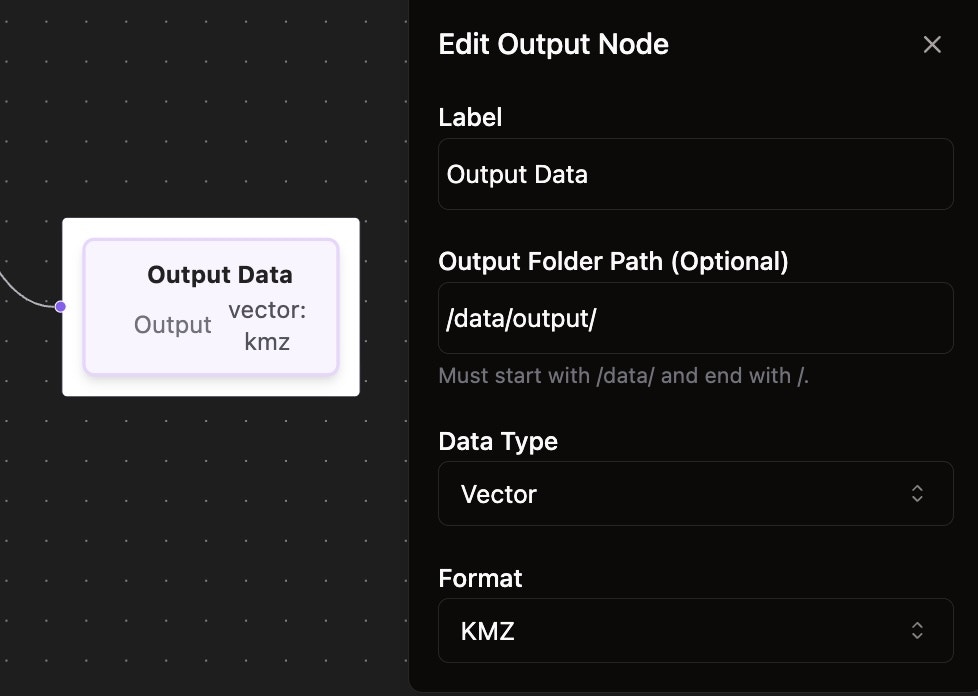
Configuring Output Nodes
Setting Output Destination
- Click on an Output Data node
- The Data Type and Format will automatically sync with the connected conversion node
- Optionally set an Output Folder Path:
- Must start with
/data/and end with/ - If left empty, outputs will be saved in the same folder as each source file
- Must start with