Running Your Workflow
Starting the Workflow
- Once your workflow is configured with input, conversion, and output nodes, click the Run Workflow button in the top-right corner
- The system will begin processing your data according to the workflow configuration
Monitoring Execution
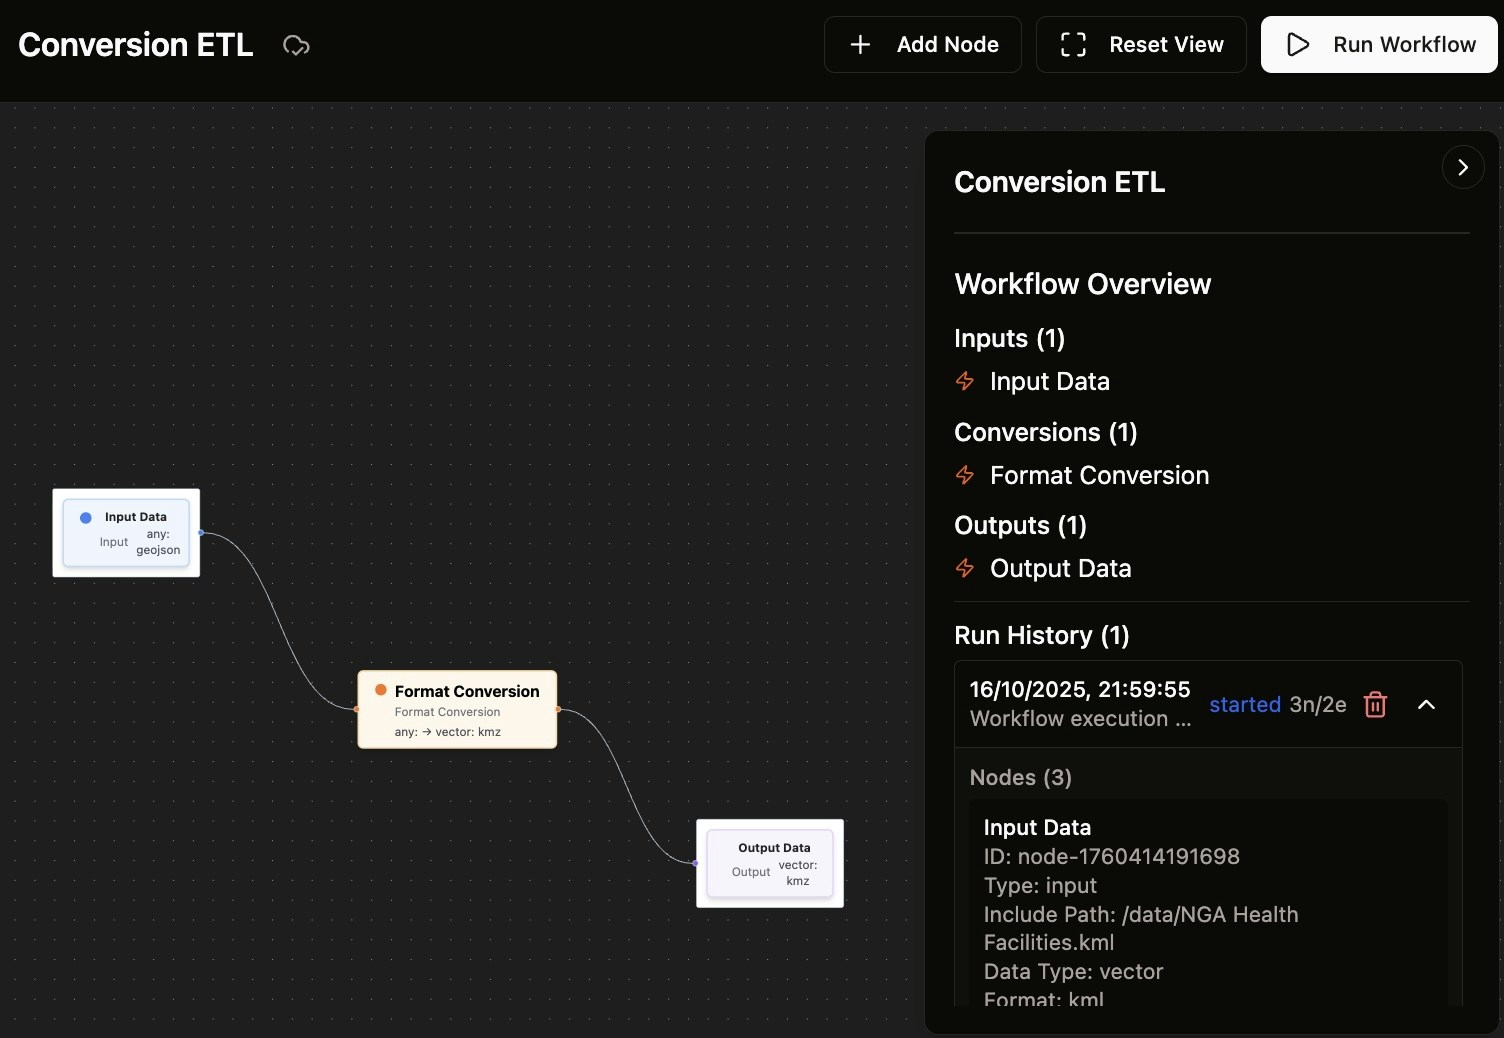
Run History
After starting the workflow:- Check the Run History section in the workflow overview panel
- You’ll see entries showing:
- Execution start time and date
- Workflow status (started, completed, failed)
- Node and edge count (e.g., “3n/2e” for 3 nodes and 2 edges)
Real-time Updates
- The UI updates progressively every 10 seconds during execution
- Monitor the status in the Run History section
- Watch for any error messages or warnings
Handling Errors and Warnings
Error Detection
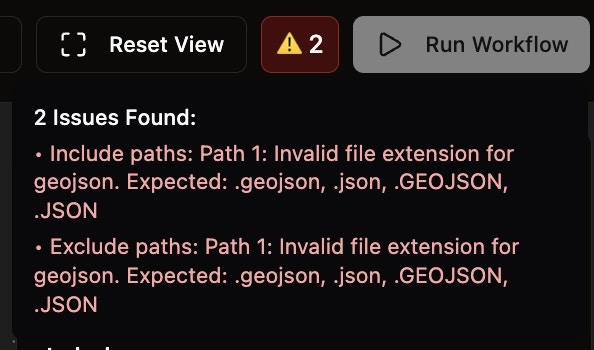
If there are issues with your workflow configuration:- The system will display a warning panel showing the number of issues found
- Each issue will be clearly explained with specific details
- Common issues include:
- Invalid file extensions for specified formats
- Missing required configuration fields
- Invalid file paths
Fixing Issues
- Review the error messages carefully
- Check that file extensions match the expected format (e.g.,
.geojsonfor GeoJSON files) - Verify that all required fields are properly configured
- Make necessary corrections and re-run the workflow
Workflow Overview
The workflow overview panel provides a summary of your pipeline:- Inputs - Lists all input nodes and their configurations
- Conversions - Shows conversion nodes and their transformations
- Outputs - Displays output nodes and their destinations