Step 1: Add Comments During Review
A reviewer role can add comments with different severity levels for labelers to see in real time and reply.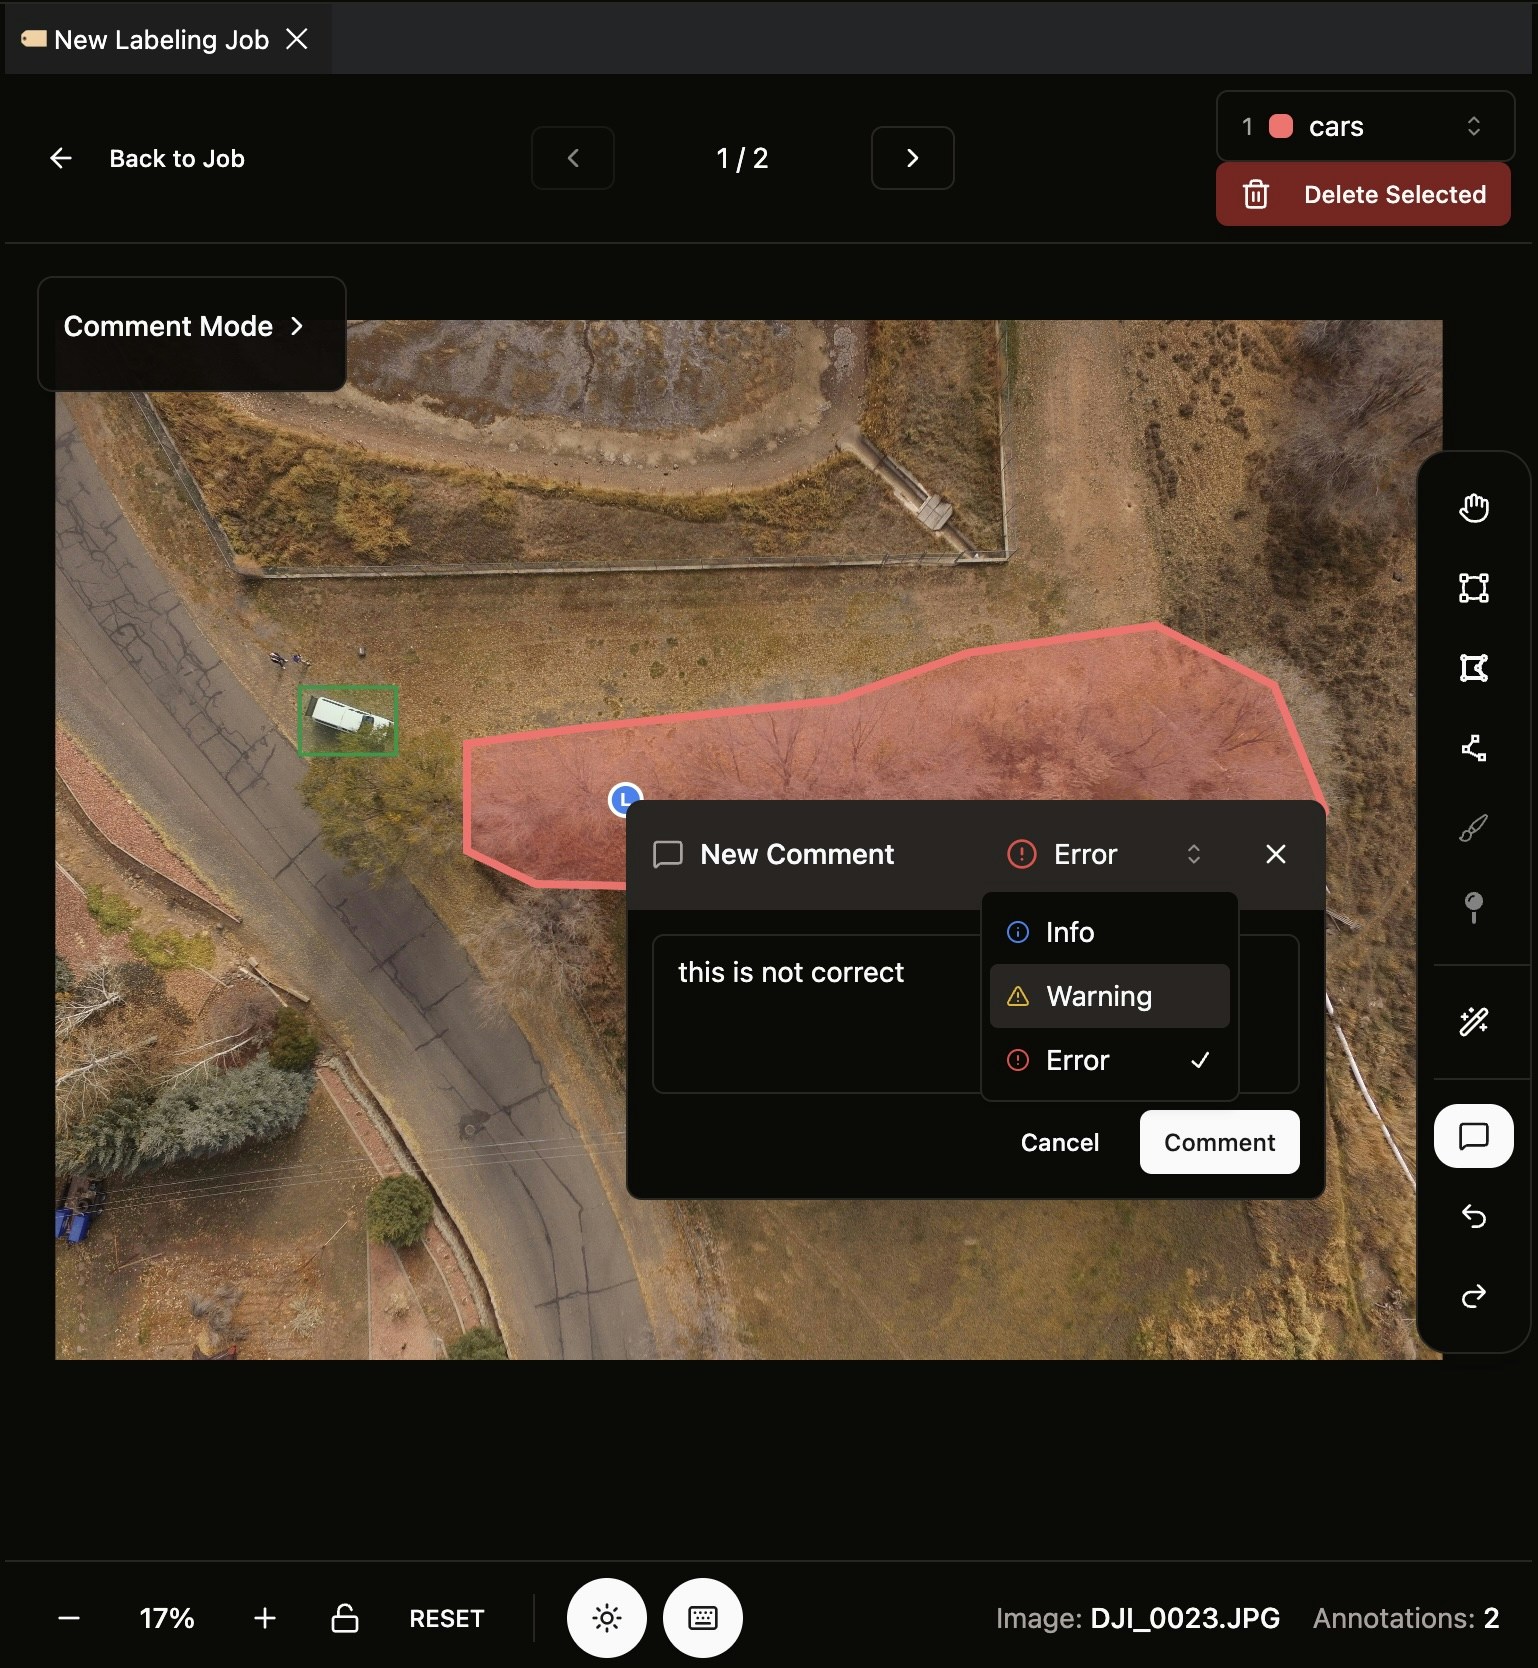
- Click the comment button on the right
- Click anywhere on the image to drop a comment there
- INFO: General information or suggestions
- WARNING: Issues that should be addressed
- ERROR: Critical problems that must be fixed
Step 2: Manage Issues in the Right Panel
The labeler right panel displays a list of all issues (comments) added to the current image.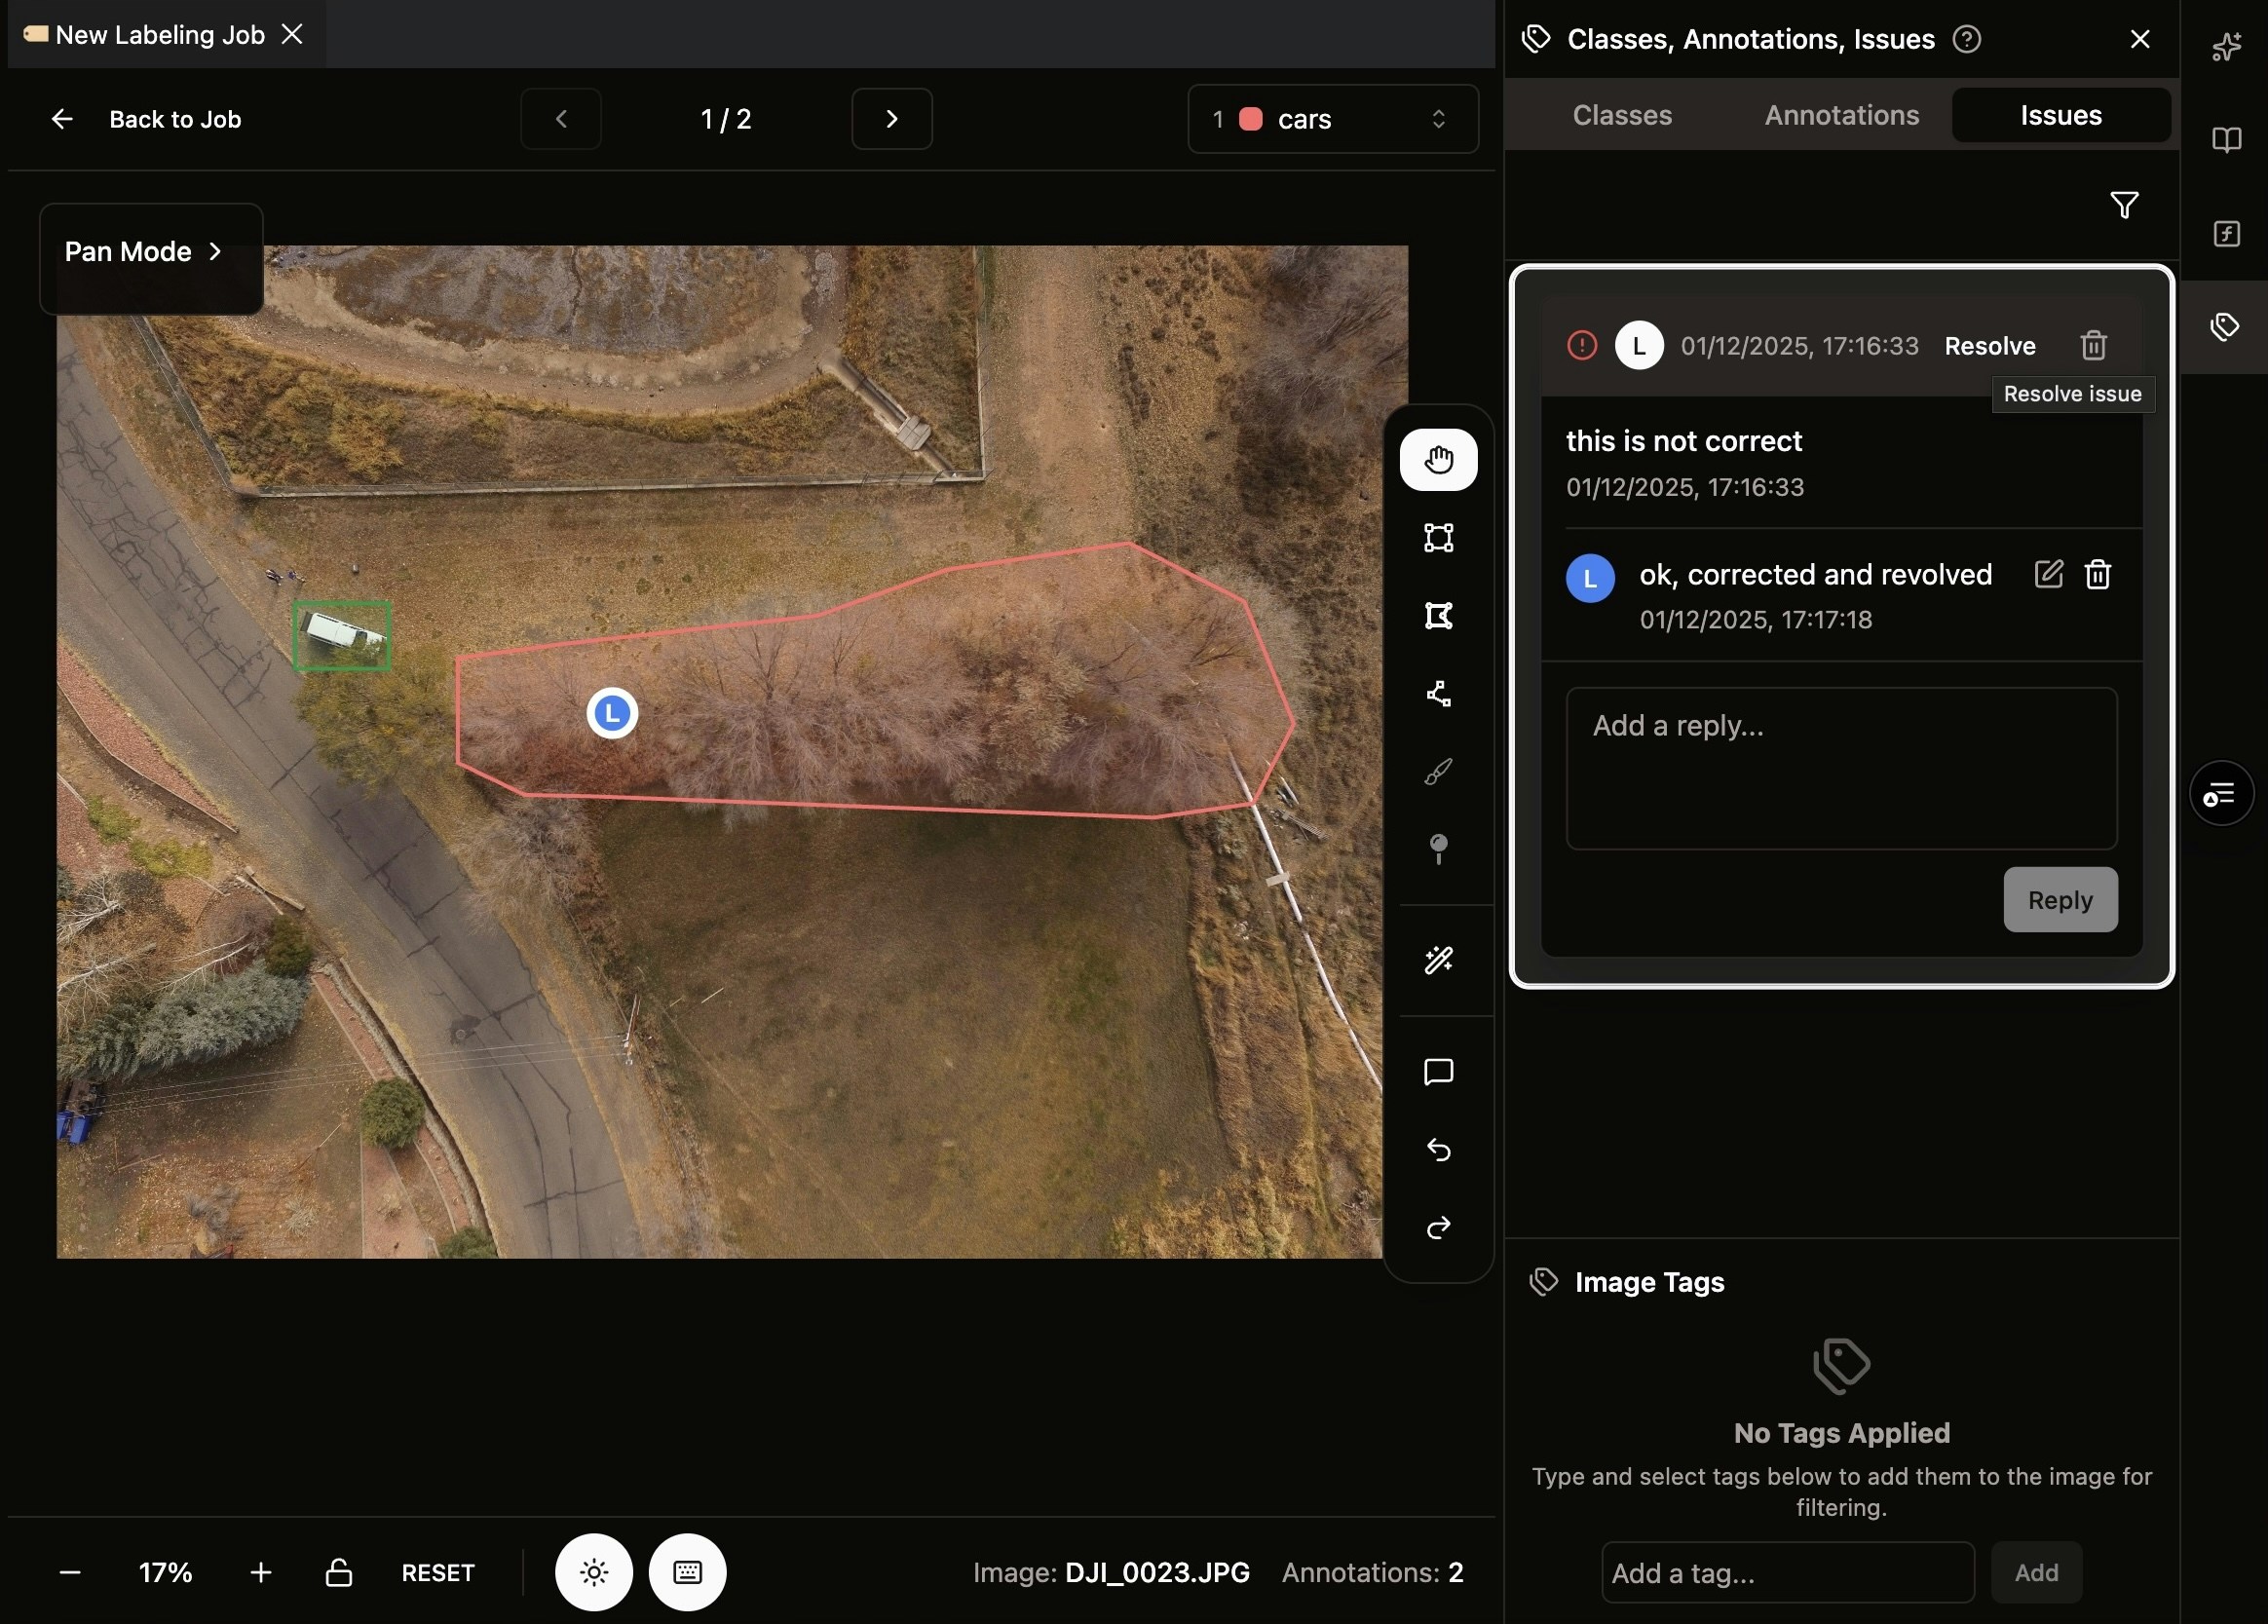
- Reply: Other users can reply to issues for discussion
- Resolve: Mark an issue as resolved once addressed
- Remove: Issue owner can remove an issue entirely from the job
Step 3: Filter and View Resolved Issues
Use the filter at the top right to control which issues are displayed.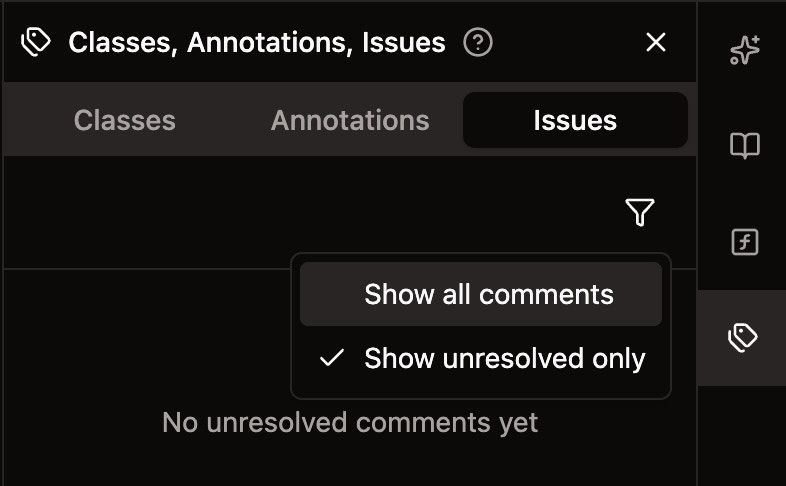
- Show all issues: View both open and resolved issues
- View resolved issues: See previously resolved issues
- Reopen issues: Reopen resolved issues for further actions if needed
Step 4: Approve or Reject the Job
Once you’ve finished reviewing all images, you can approve or reject the job overall.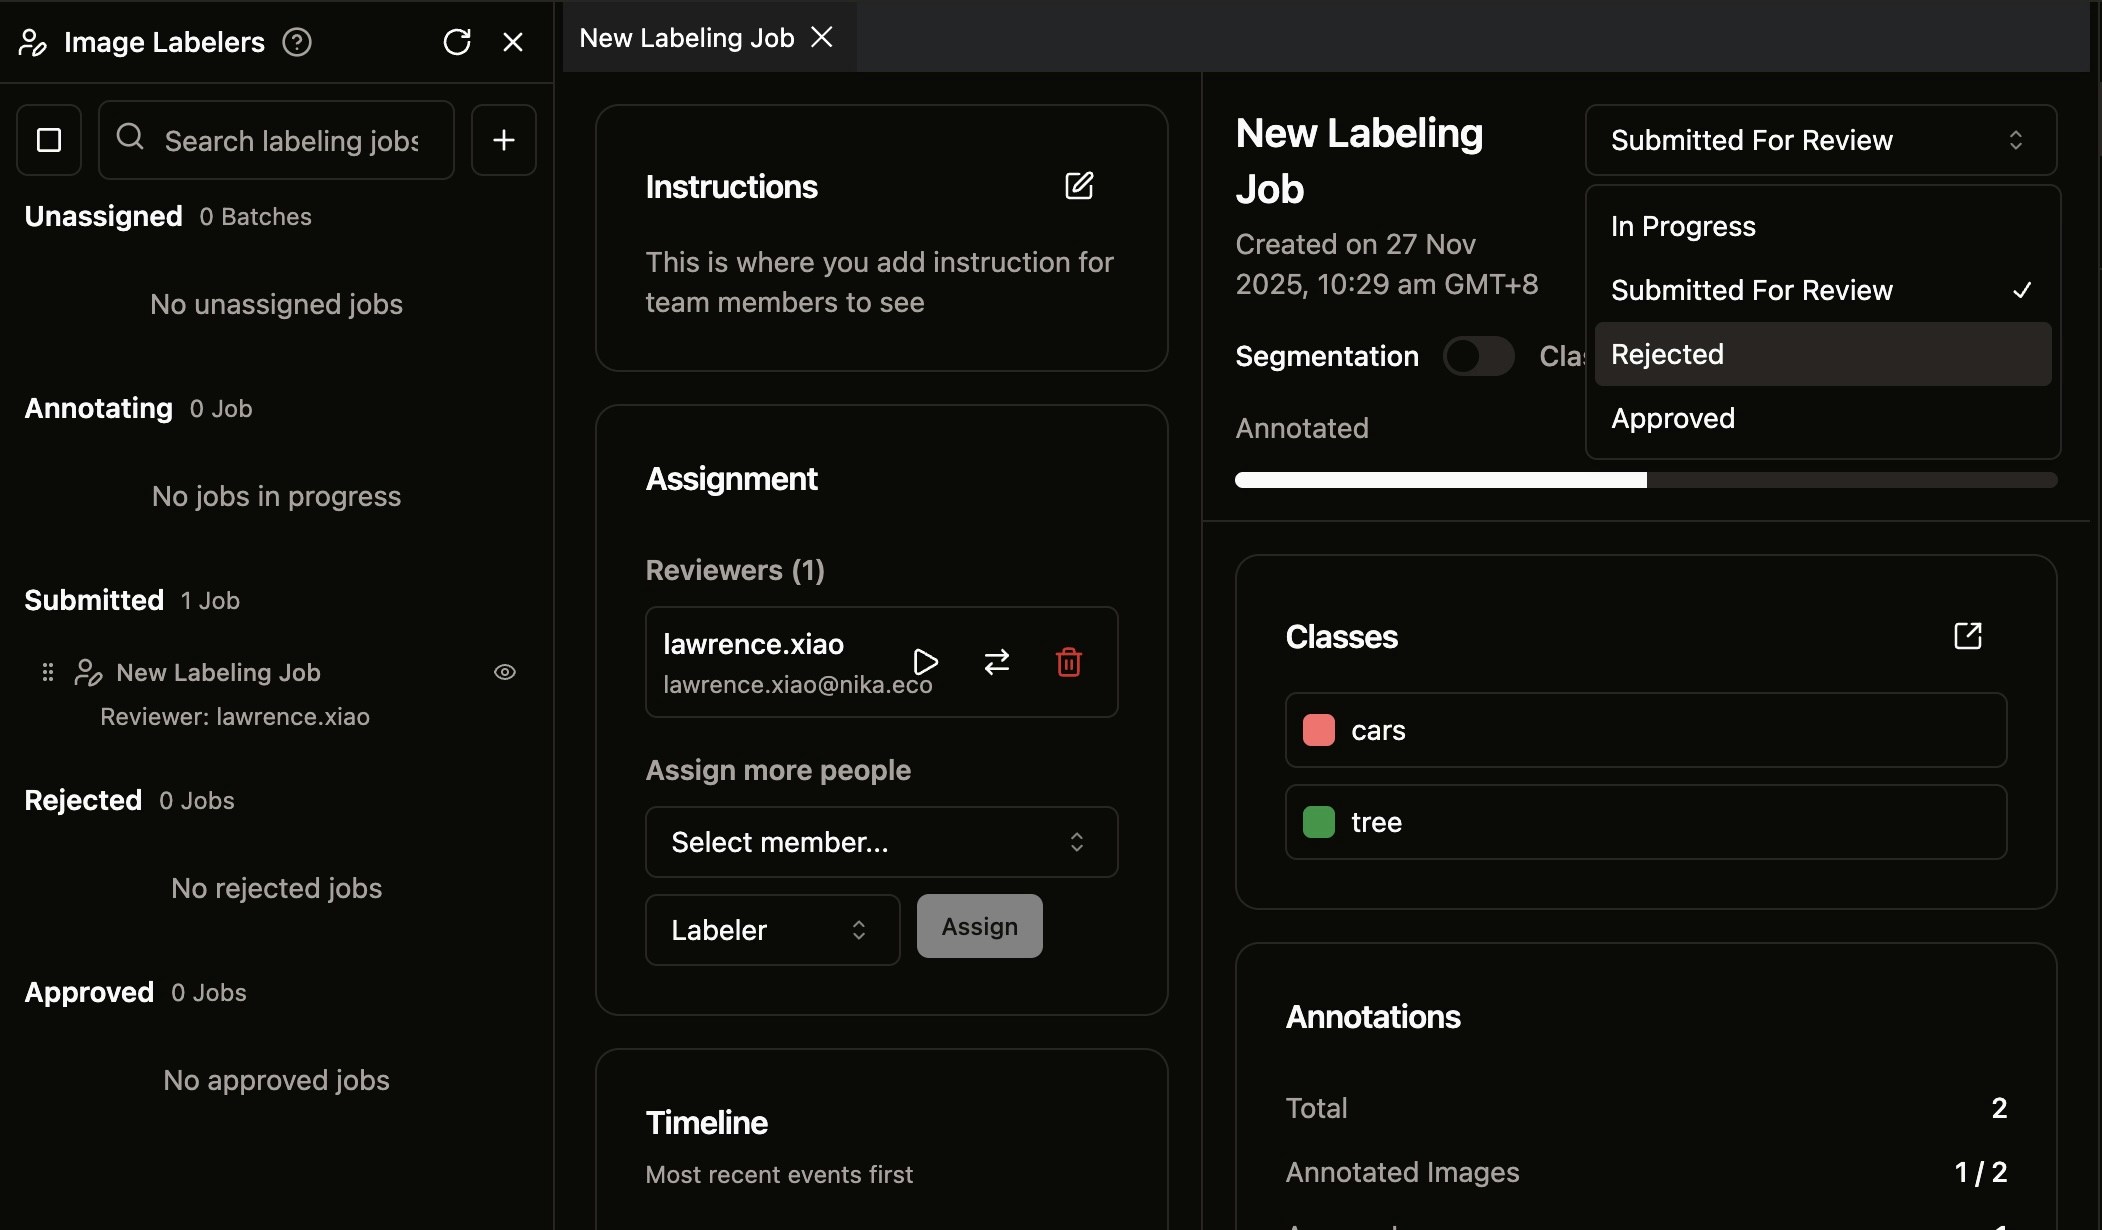
- Go back to the job overview page
- Click Reject or Approve at the top right